Record templates
Record templates have many different uses throughout the system, but are most widely used to print out details via PDFs from the system or to send documents for electronic signatures. Each record template is built for a specific object, and can use the fields of that object within the template. For example, you can create a contract record template for the Deal object, and include all the details from the deal, such as a contract with all the relevant prices or dates. Another example is creating a health declaration for the Contact object, which can then be sent out and signed by contacts.
Accessing record templates
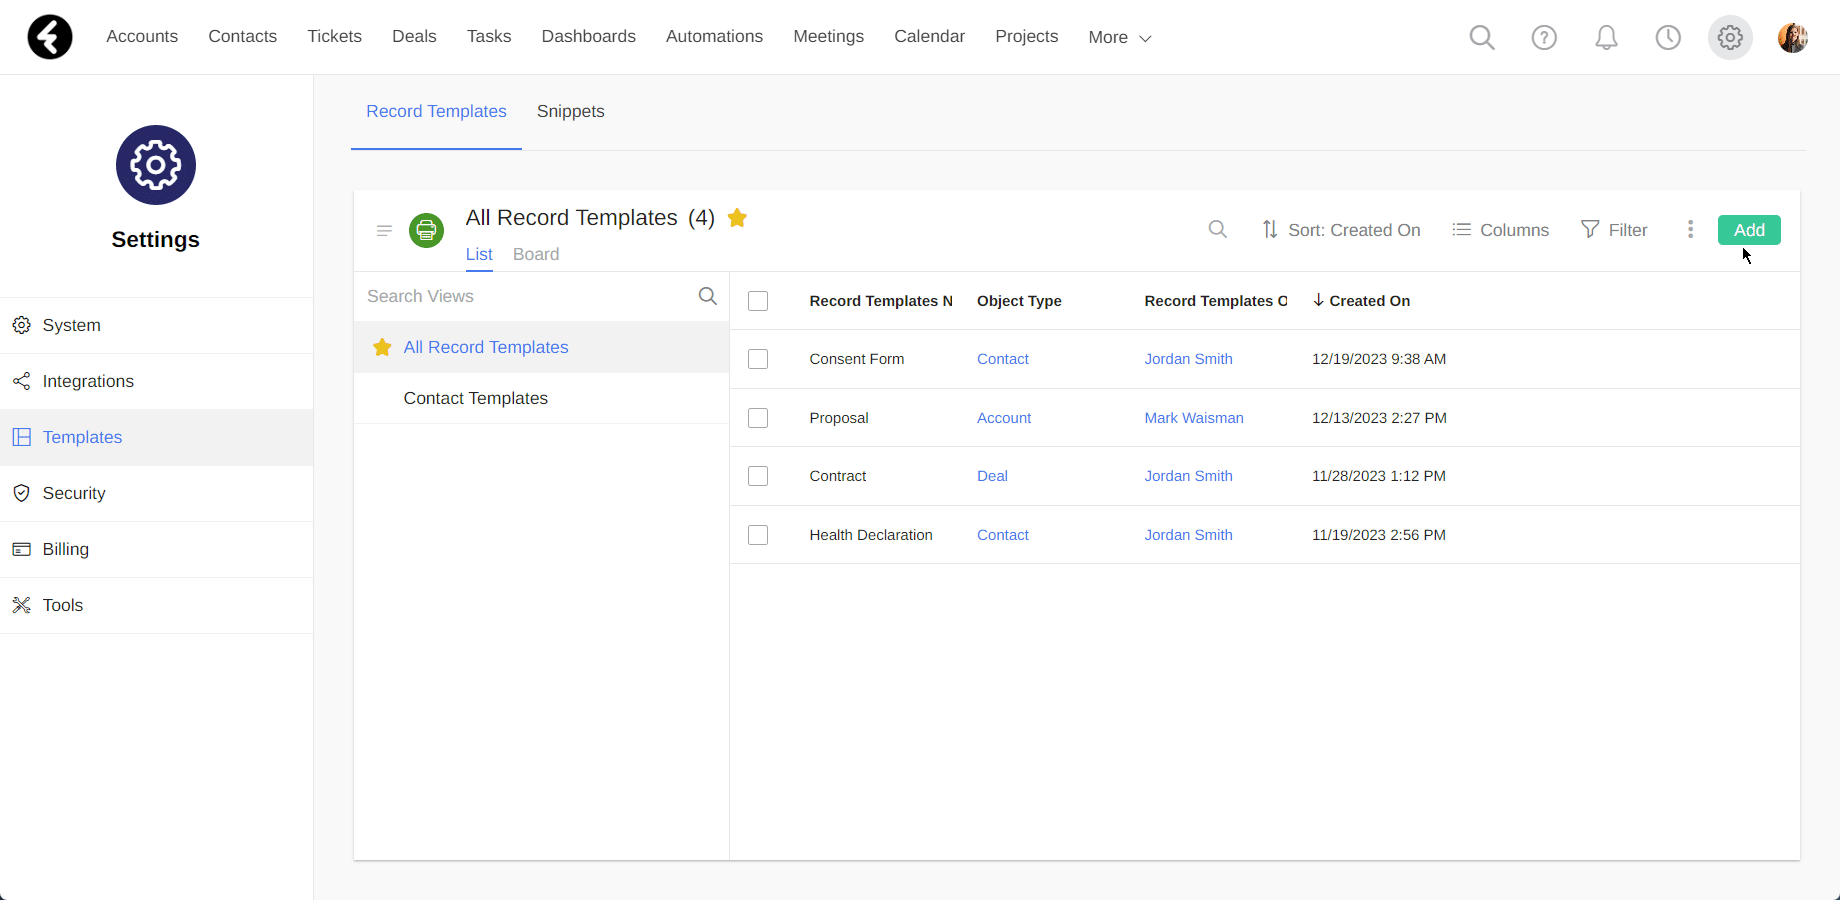
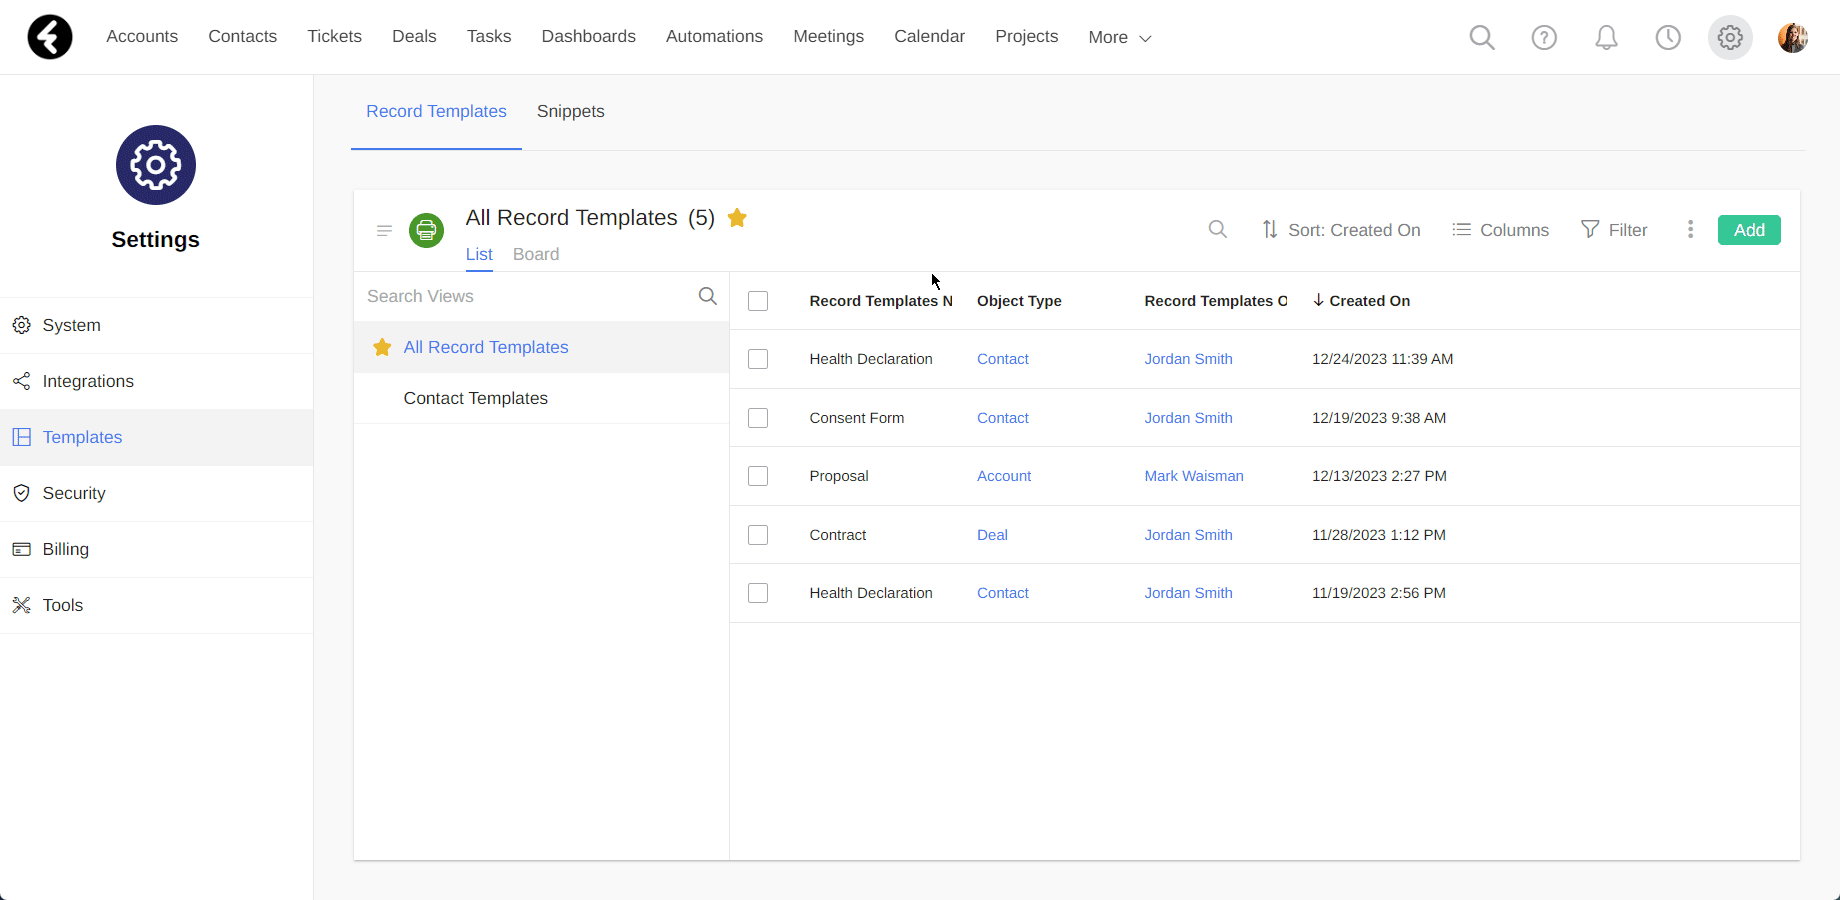
To create a new record template first navigate to the record templates object. Click the settings gear on the top right of the page, and then select the Templates tab from the sidebar menu. This will automatically open the Record Templates page, where a list view will be displayed with all your record templates.
Creating record templates
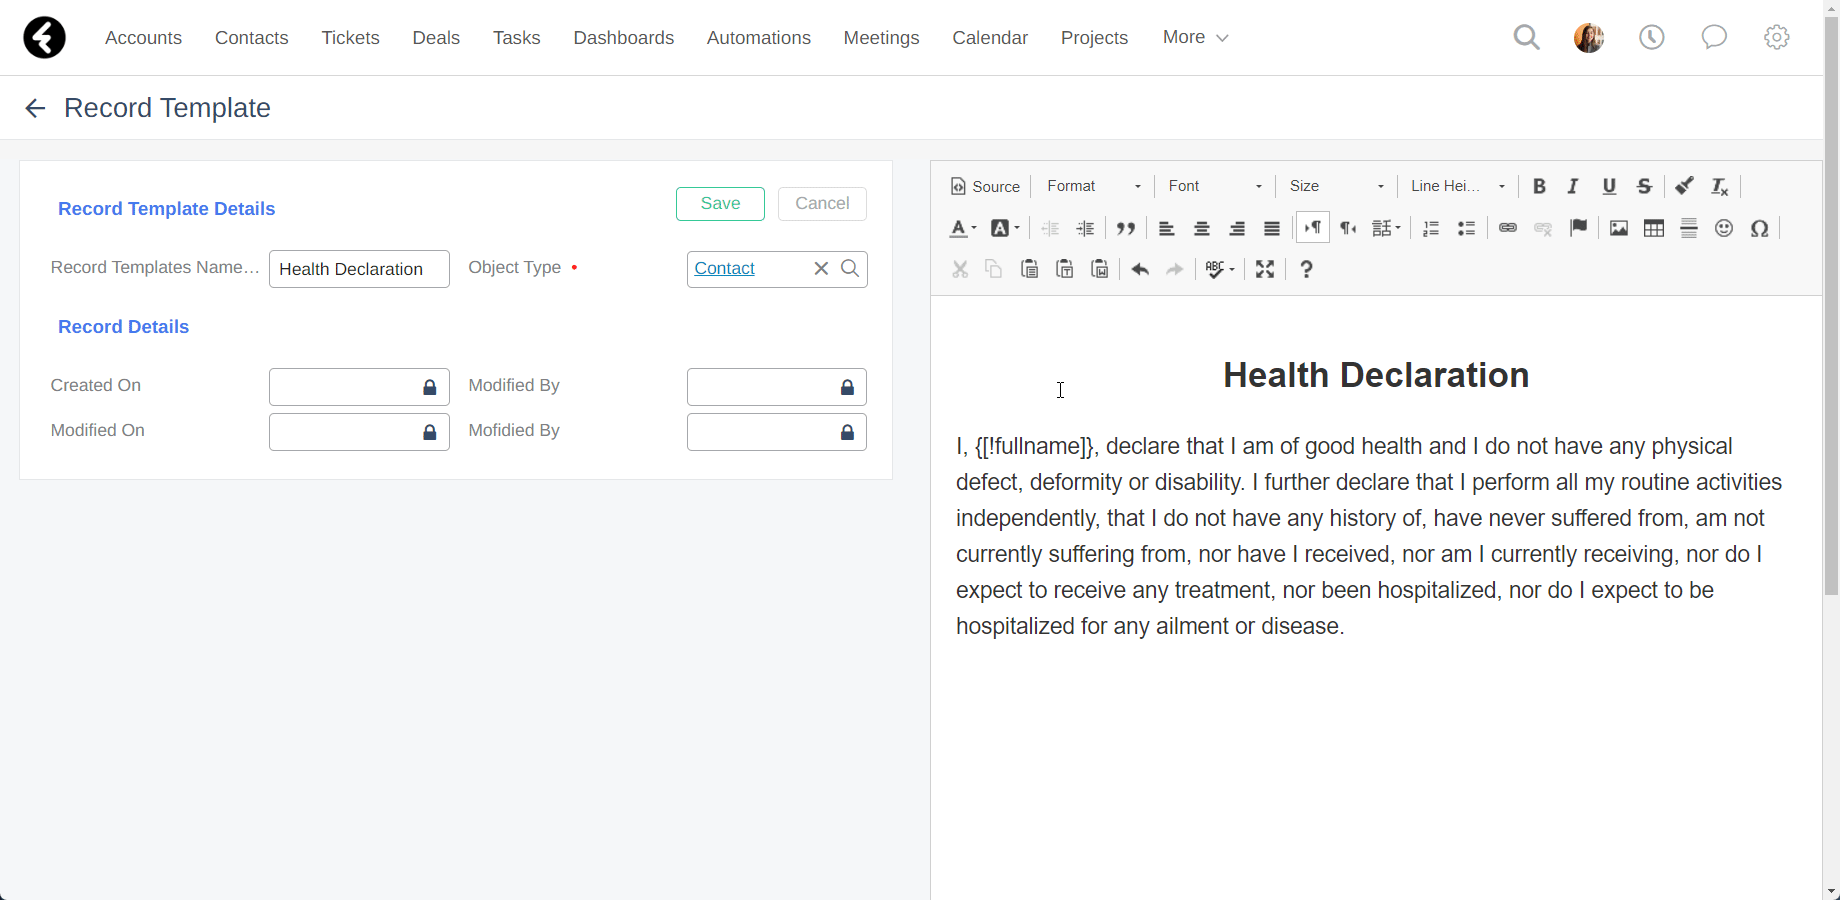
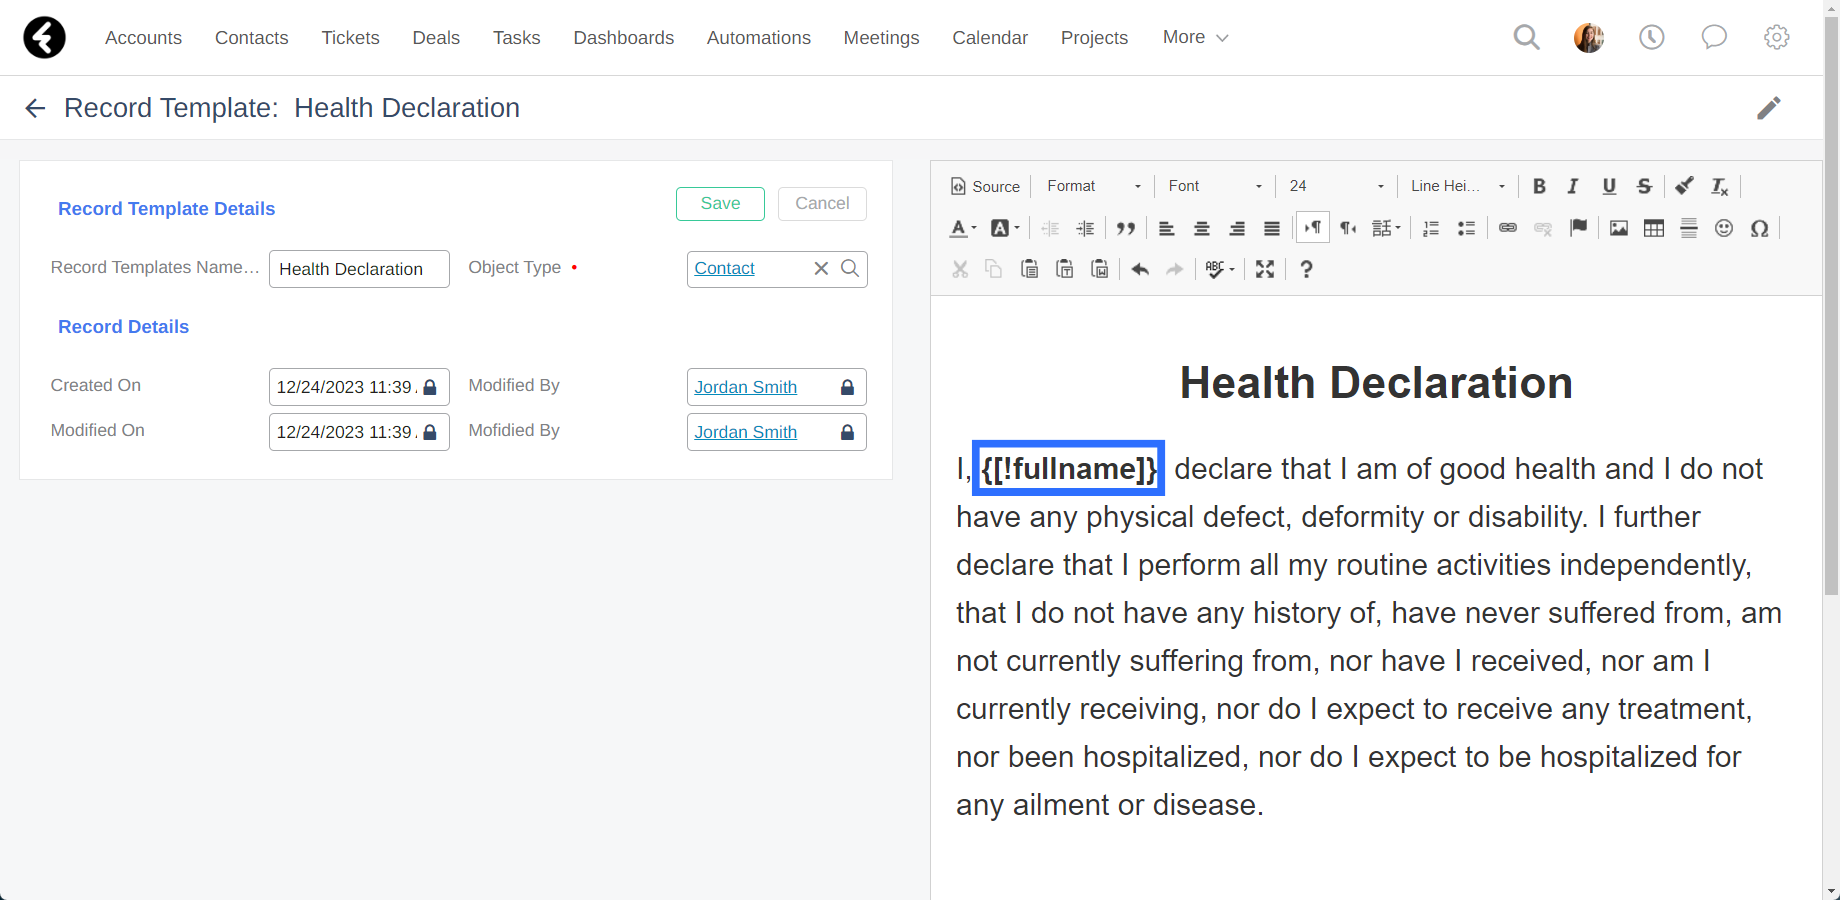
To create a new record template, start by clicking the green Add button on the top right of the record templates list. This will open the individual record template page. On the left of the page you’ll find a form with the record’s fields, and on the right you’ll find an editable text box where you can set the content of your new template. You can now fill out the name of your new template under the Record Templates Name field. The name you set here will be used as the name of the file whenever it is e-signed, so make sure to use a relevant and appropriate name.
Selecting an object type
Next choose an object from the Object Type picklist by clicking the magnifying glass and clicking on an object. The object you choose here will be the object which you’ll be able to access the record template from. For example, if you choose Contact, you’ll be able to access this record template from any of the contact records. This could be useful when creating a template of a health declaration for individual contacts. Both the Name and Object Type fields are required, and you’ll need to fill them out in order to save your template.
Setting the template content
You can now use the editable text box on the right side of the page to set up your template. You can choose to simply type in text and use the formatting options found in the top bar, or you can click the Source option on the top left to code in HTML instead. For this reason, it’s important to have a technical background when setting up your templates. The editor and source code present the same data in different formats, where the editor shows plain text and the source code shows the HTML format. Both will update dynamically, so that changing anything in the source code will change the editor text, and vice versa. Once you’ve set up your template, click the green Save button on the top right of the form to save your new template. You can also click Cancel at any time to delete your new record; This will delete the entire record, including anything you’ve already added to the template content.
Field references
You can use field references, which you can learn about here, in your template content to include data from specific fields. In this way each template will include details which are specific to the record it was printed or sent from. For example, you can create a health declaration in the contact object which uses field references to include the full name, gender, and contact details for each contact record. To start, copy the relevant field reference from the automations object, as is explained here.
Next, paste the field reference directly into your record template in the place you’d like it to appear in. For example, you can paste the {[fullname]} field reference into a sentence to use the name of your contact within the text of your template. The name will then fill in based on whichever contact record you access the template from.
Existing record template
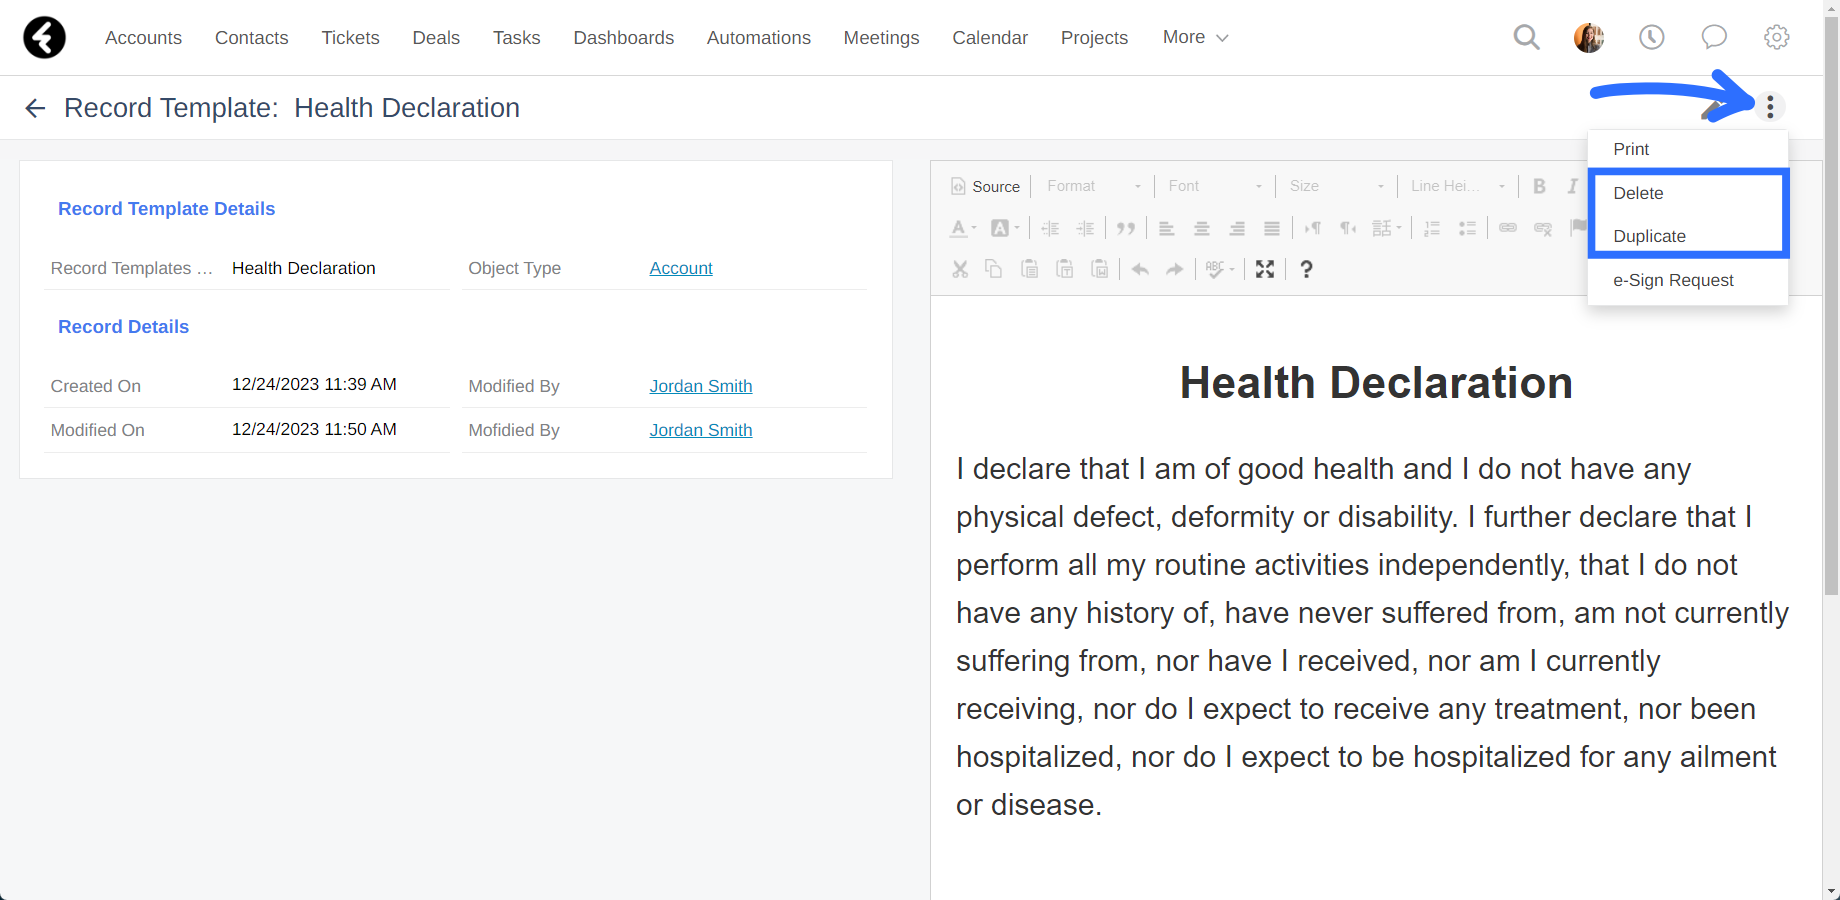
Once you’ve opened the record templates page, explained above, you can click on any of the existing records to open their individual page, where you can choose to edit, duplicate, or delete them.
Edit
To edit an existing record template, first click the pencil icon on the top right to open the edit mode. You can now change the content of the editor on the right with the template data, or even change the name or object type of the template. Once you’ve finished, be sure to click the green Save button on the top right of the form. You can also click Cancel to revert your changes and return the template to the state it was in before you opened edit mode.
Duplicate
You can easily duplicate an existing record template by opening the three dot menu on the top right of any record template’s page, and then selecting the Duplicate option. Next click Ok in the pop up. Your new record template will open with the word Copy appearing before its name. This is very useful for times where you want to use the same record template but for different objects, or to quickly create templates with slightly different texts.
Delete
To delete an existing record template, simply select the Delete option from the three dot menu, and then click Ok in the pop up. Your template will be permanently deleted, and you’ll be returned to the Record Templates page. You can also delete record templates using the bulk delete method, which is explained here.
Using record templates
Record templates can be used for two primary purposes in the system, printing PDFs and obtaining digital signatures.
Printing PDFs
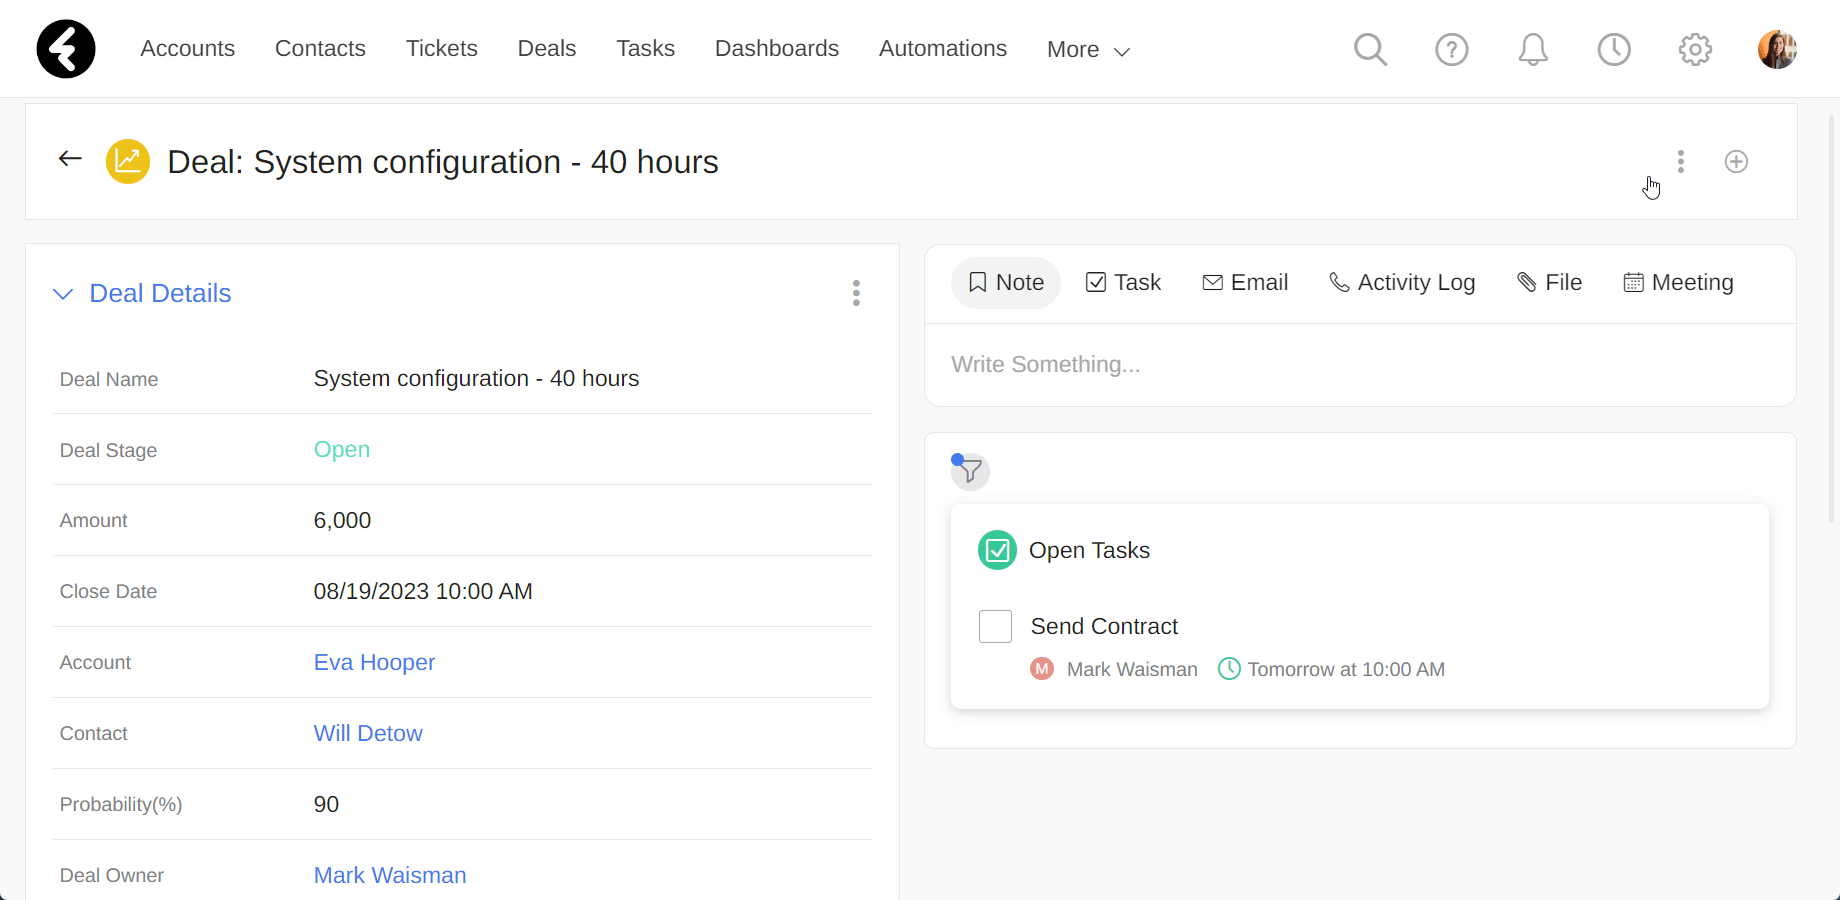
Once you’ve created a record template, you can print it directly from any record which belongs to the same object type of the template record. For example, after creating a contract record template for the Deals object, you can go to any deal record and use the template.
Start by opening the record you’d like to print the template from. Next, open the three dot menu from the right of the record header and select the Record Template option. This will open a list of all the record templates which belong to the current object type. Click on a template to download it onto your computer as a PDF. The name of the file will be the name of the object followed by a dash and the name of the record. For example, the name of a file may be “Deal-System configuration”. You can rename the file and move it to a relevant location on your computer to keep track of it. You can then easily send all of a specific deal’s details to a client easily in an organized PDF.
At the bottom of the list you’ll find the + New Record Template option, which will bring you to the record templates page explained above and automatically fill in the Object Type field with the current object. If you have no record templates which belong to the current object, you’ll only see this option.
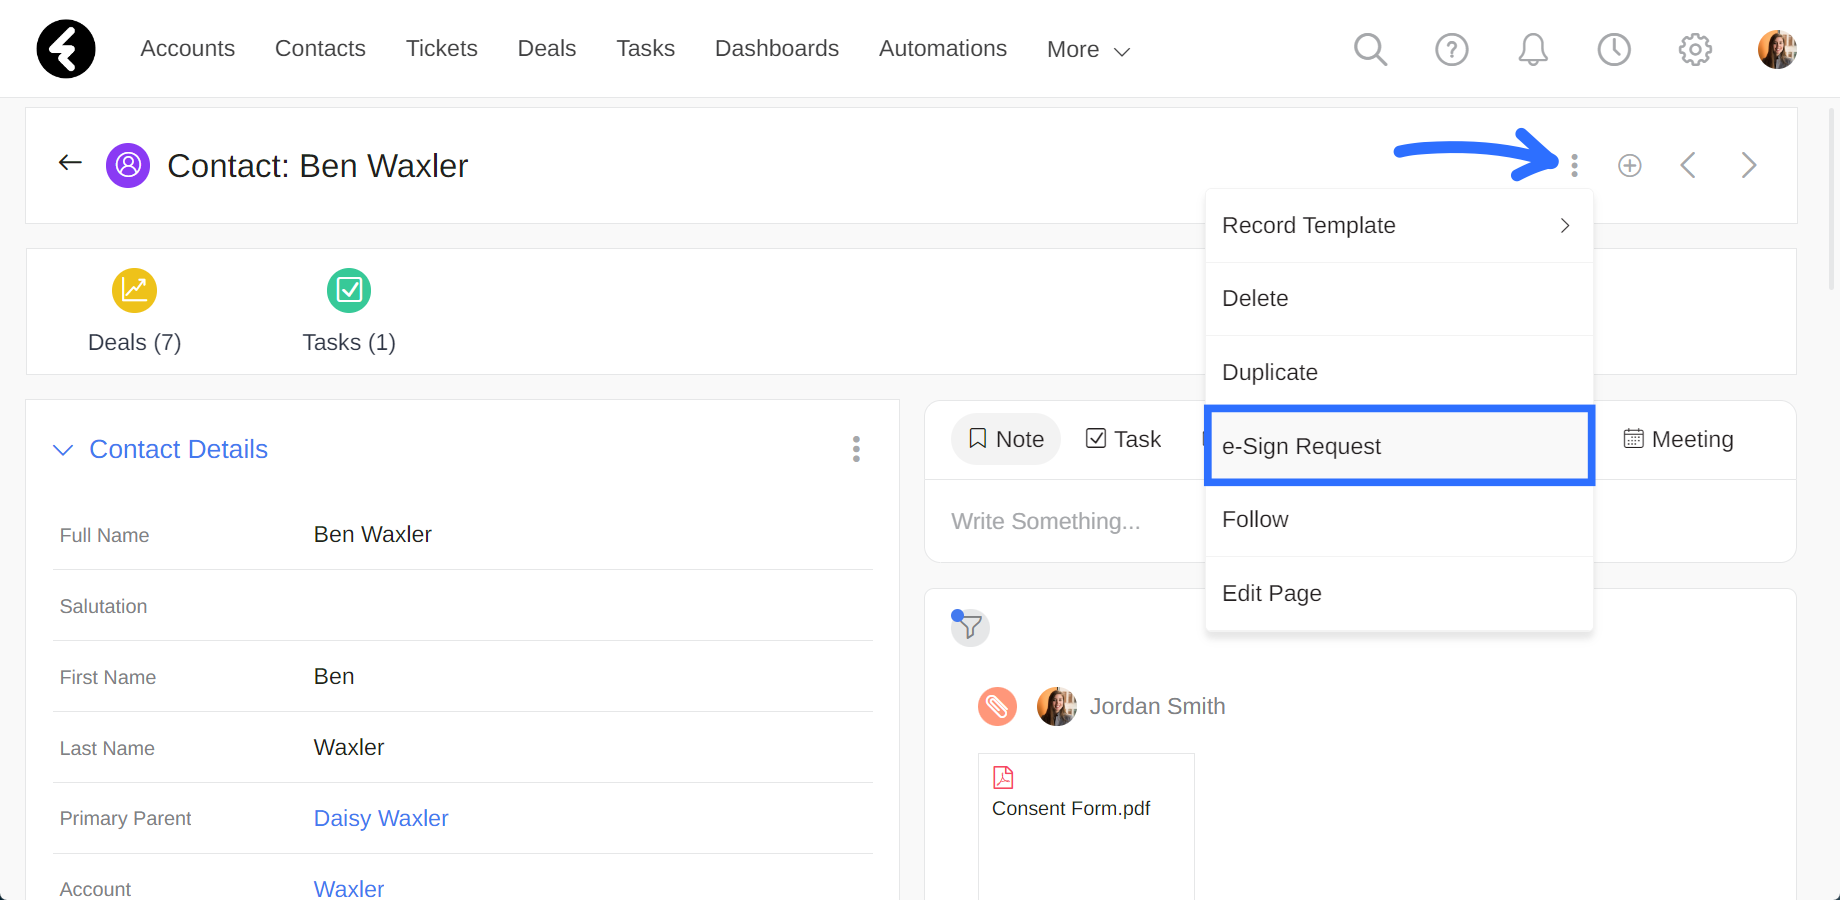
e-Sign
The other place where your record templates can be used in the system is for e-signatures, which allow you to obtain digital signatures on record templates. For example, you can create a contract record template, send it out to a client, and have them easily sign the contract. The signed contract will automatically save in your system. Use the e-Sign Request option from the three dot menu of any record to send out its record templates for signatures. You can learn more about e-Sign here.