Picklist fields
Picklist fields are useful when you need to add specific values to a field on a regular basis. In addition to avoiding spelling mistakes and variations, this is also crucially important for fields you’d like to categorize according to value, such as the status field. You can then easily use the predefined status options in filters, views, and more.
To create a picklist field, simply choose the Picklist option when you create a new field and then set a name. For a detailed explanation on adding and editing fields, see the following article. Once you’ve created your new picklist field or opened an existing one, you can edit its settings. Each setting is explained below using the account ratings picklist as an example.
Adding and editing options
The options of a picklist field are the predefined values which users can pick from. Options are completely customizable, and you can even control which options will be displayed using a controlling field, which is explained below.
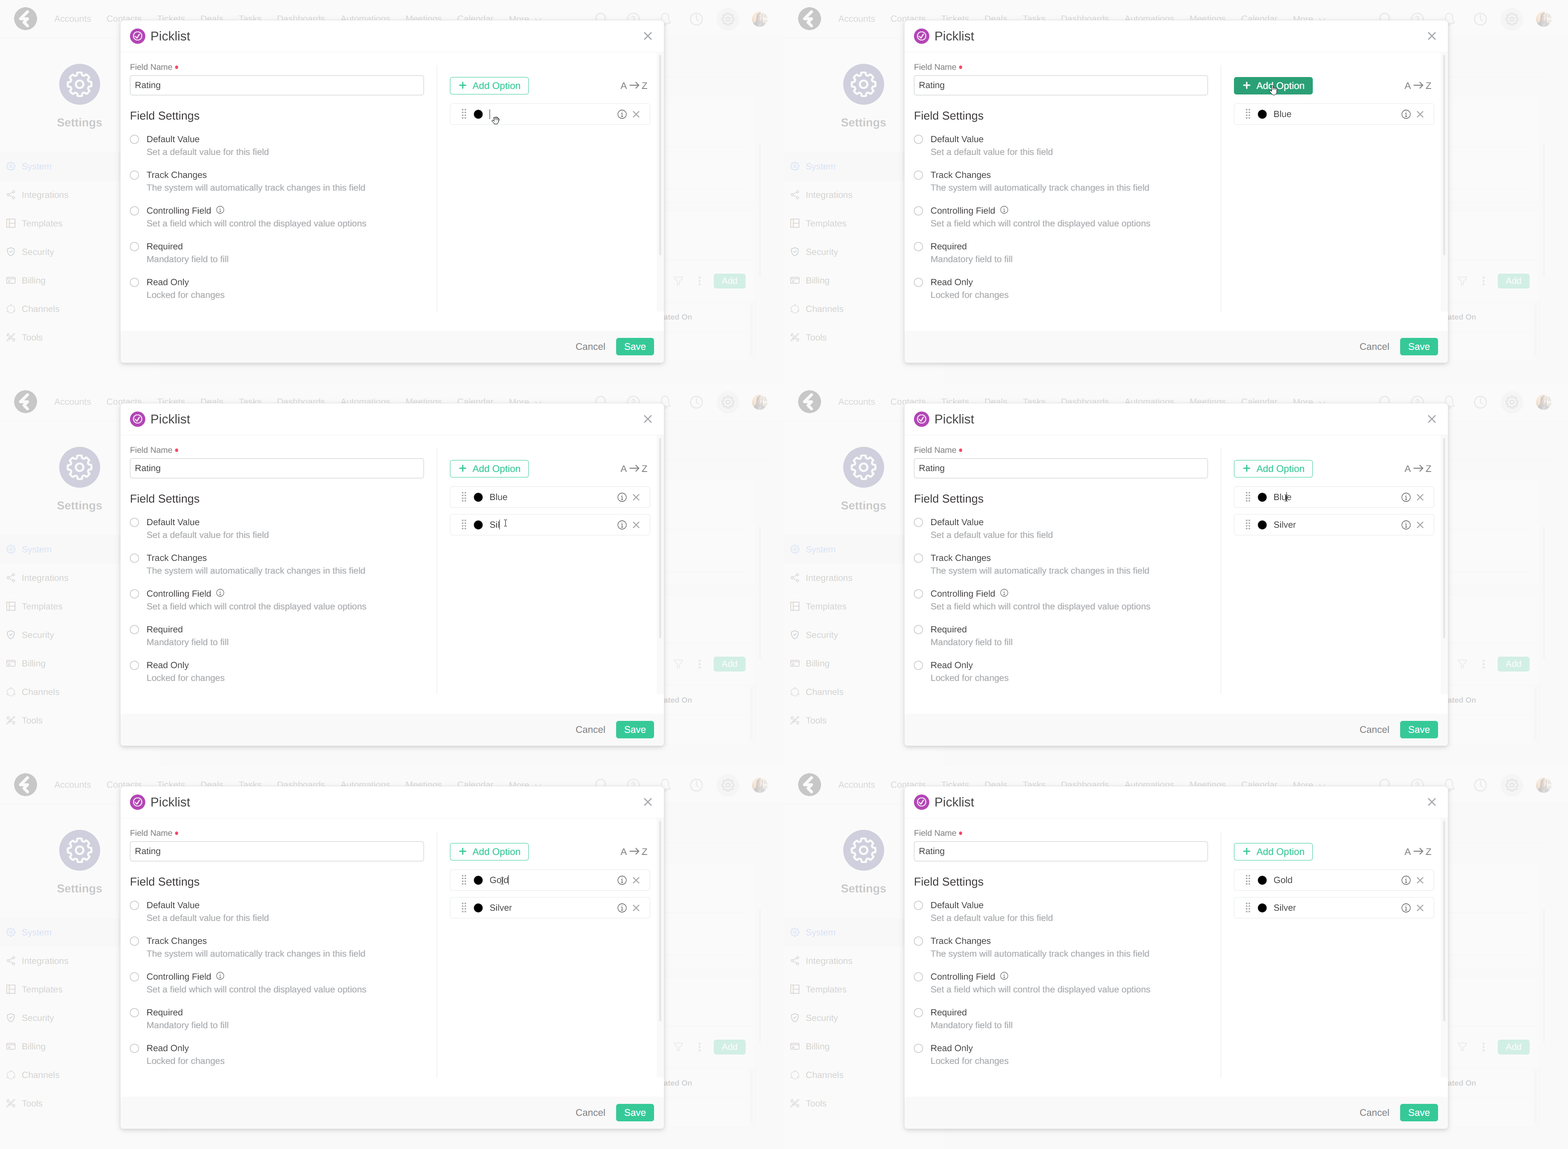
On the right of the picklist editor you can use the Add Option button to add the options you would like to appear in your picklist. This will add a new blank option where you can set the name by typing it in the box, such as gold or silver. To add another option, like bronze, simply click the Add Option button. To edit an option, simply click on it and change the name to anything you’d like.
Colors
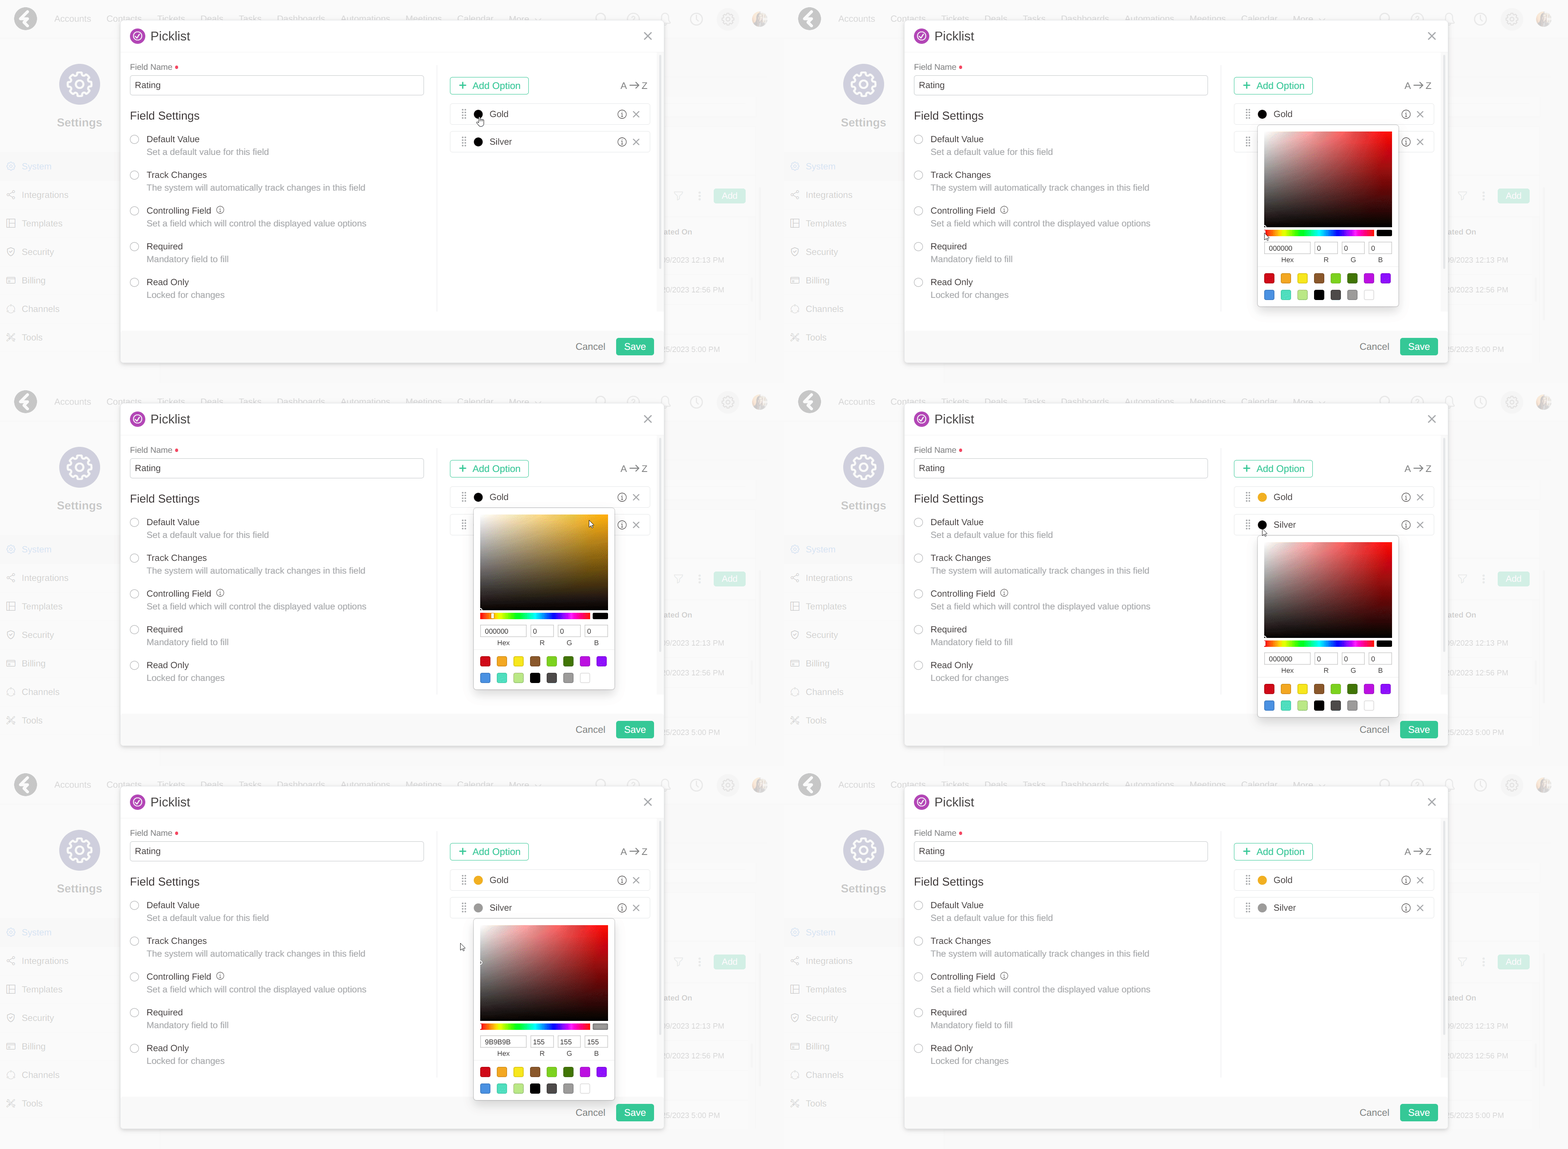
You can also set the color of your new option. This will let you better visualize your options by, for example, setting the gold option’s color as gold. By clicking on the circle to the left of the option’s name, you’ll open a pop-up box where you can either select one of the preset colors or set any custom color you want using the grid, a hex code, or RGB. Change a color at any time by clicking on it.
Ordering
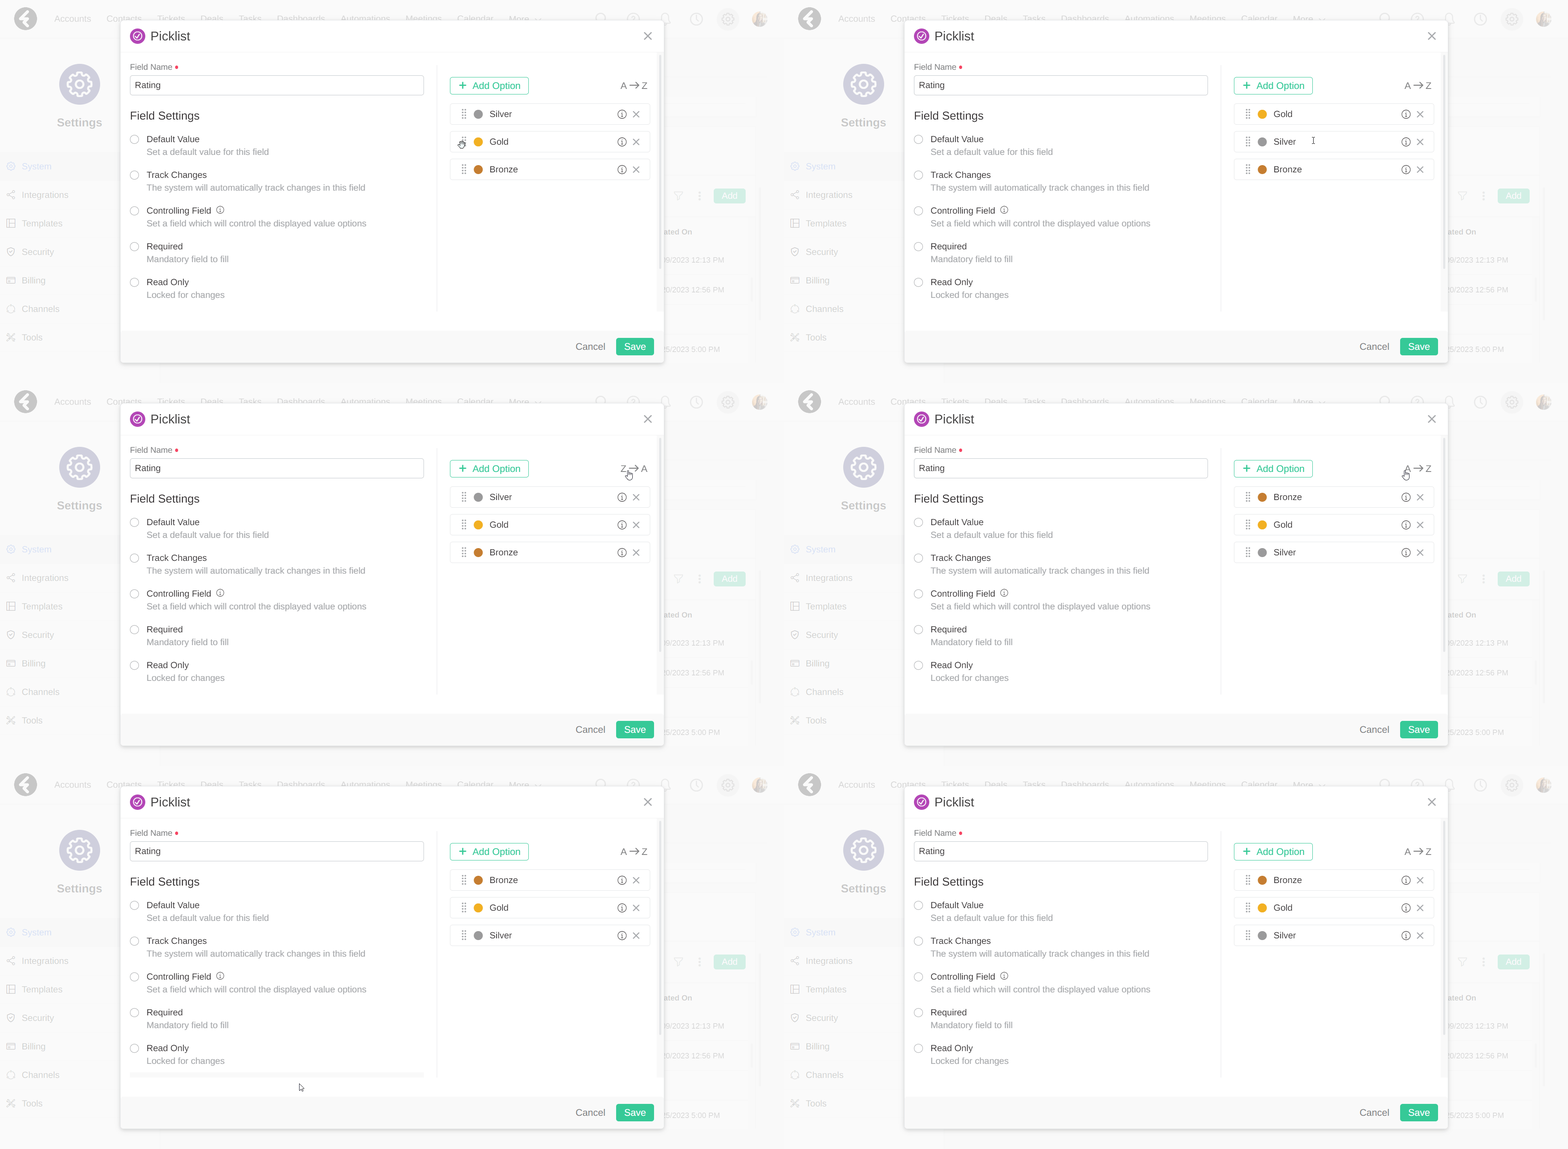
The order of your options is completely customizable. You can move around the options by dragging and dropping them using the grid on each option's far left side. You can also use the A–>Z icon to order the options from A to Z.
API values
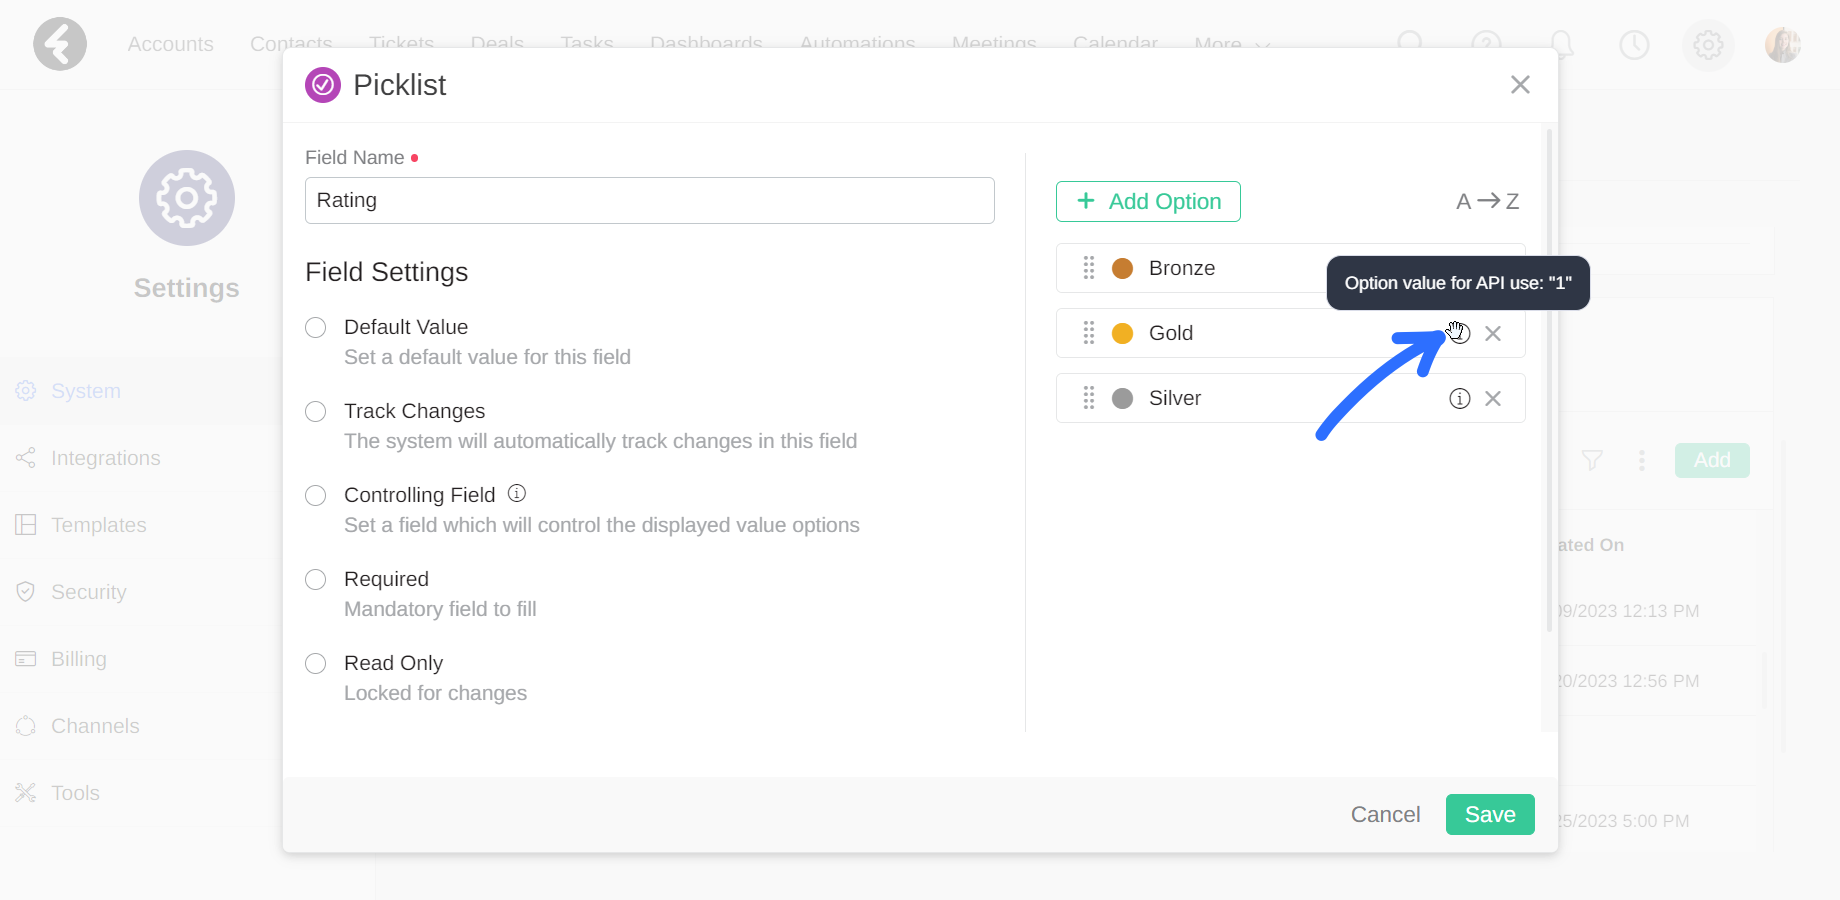
By hovering over the ⓘ icon on the right of each option, you can see the API value of the option. This is very useful when using APIs. A common use of API values is when importing leads into the system where you want to preset picklist fields such as their status or lead source.
Deleting options
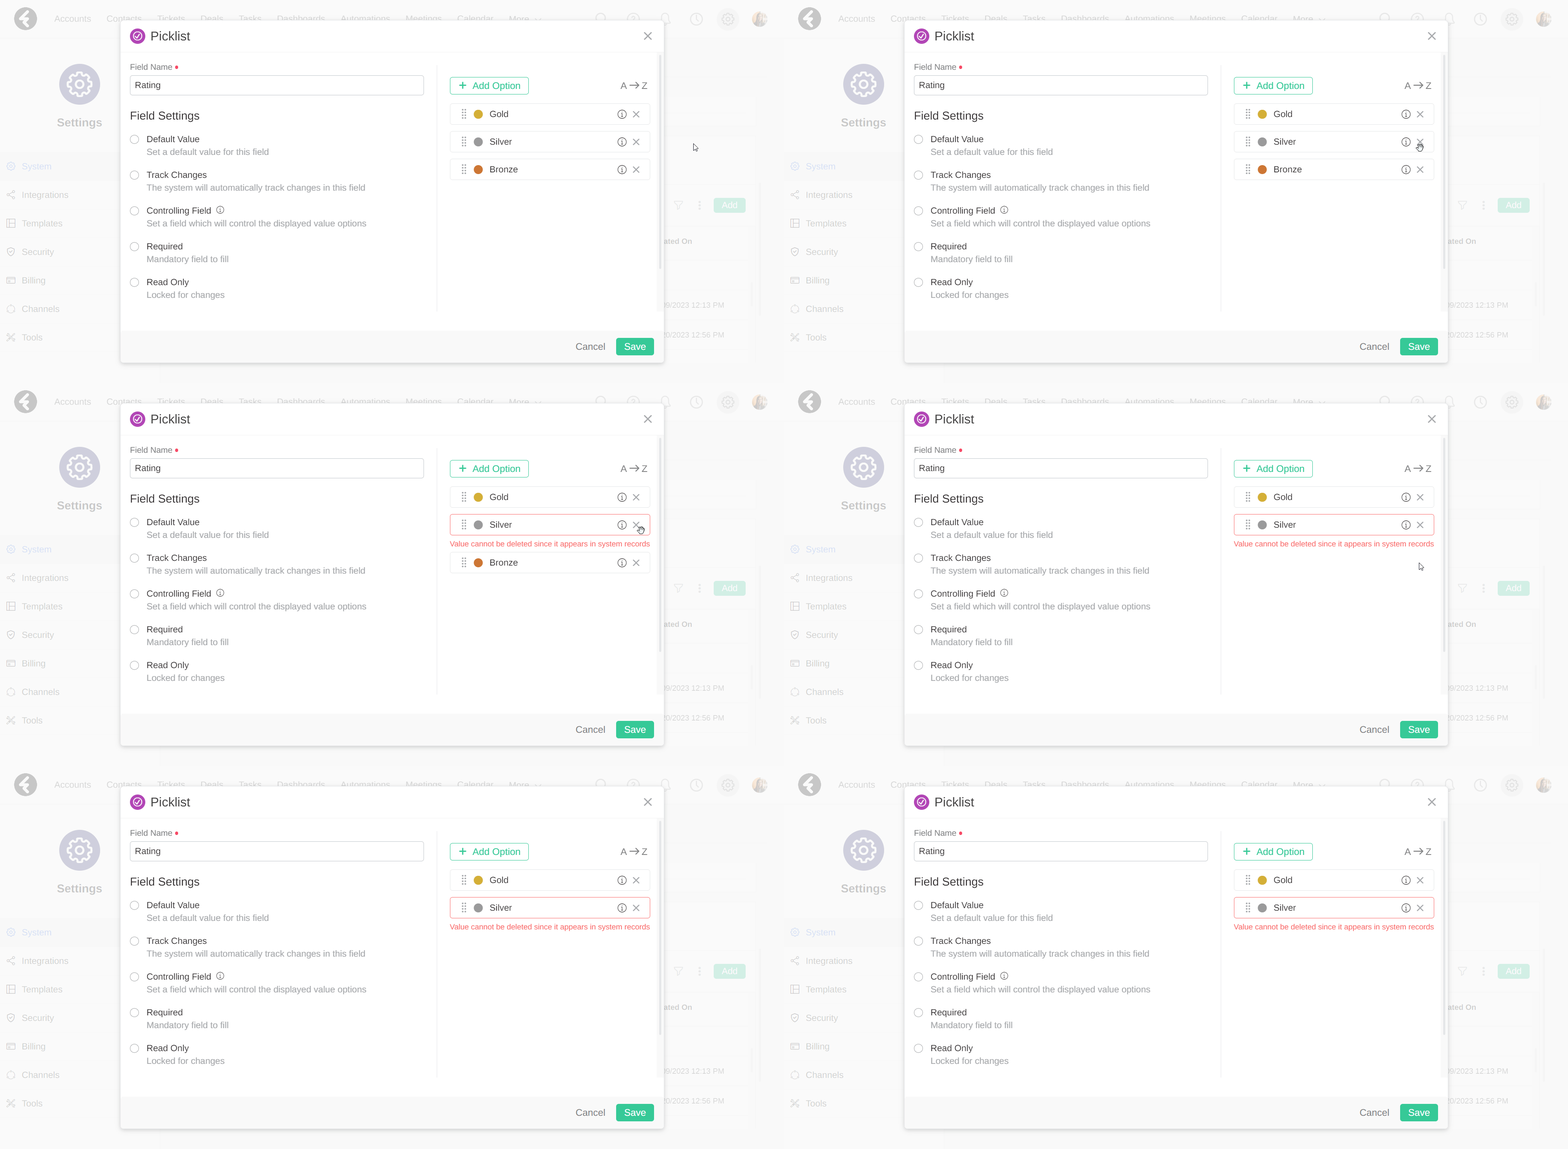
You can delete an option using the x on the far right. If an option is currently in use, an error message will appear and you will not be able to delete it. In this way, you won’t lose any important information. If you’d like to delete an option which is in use, first remove it from any place where it is being used, and then go back and delete it. A good way to do this is using the bulk edit option, which you can learn about here.
Controlling field
A controlling field will control the options available in the picklist field of each record based on the value of the selected controlling field in the same record.
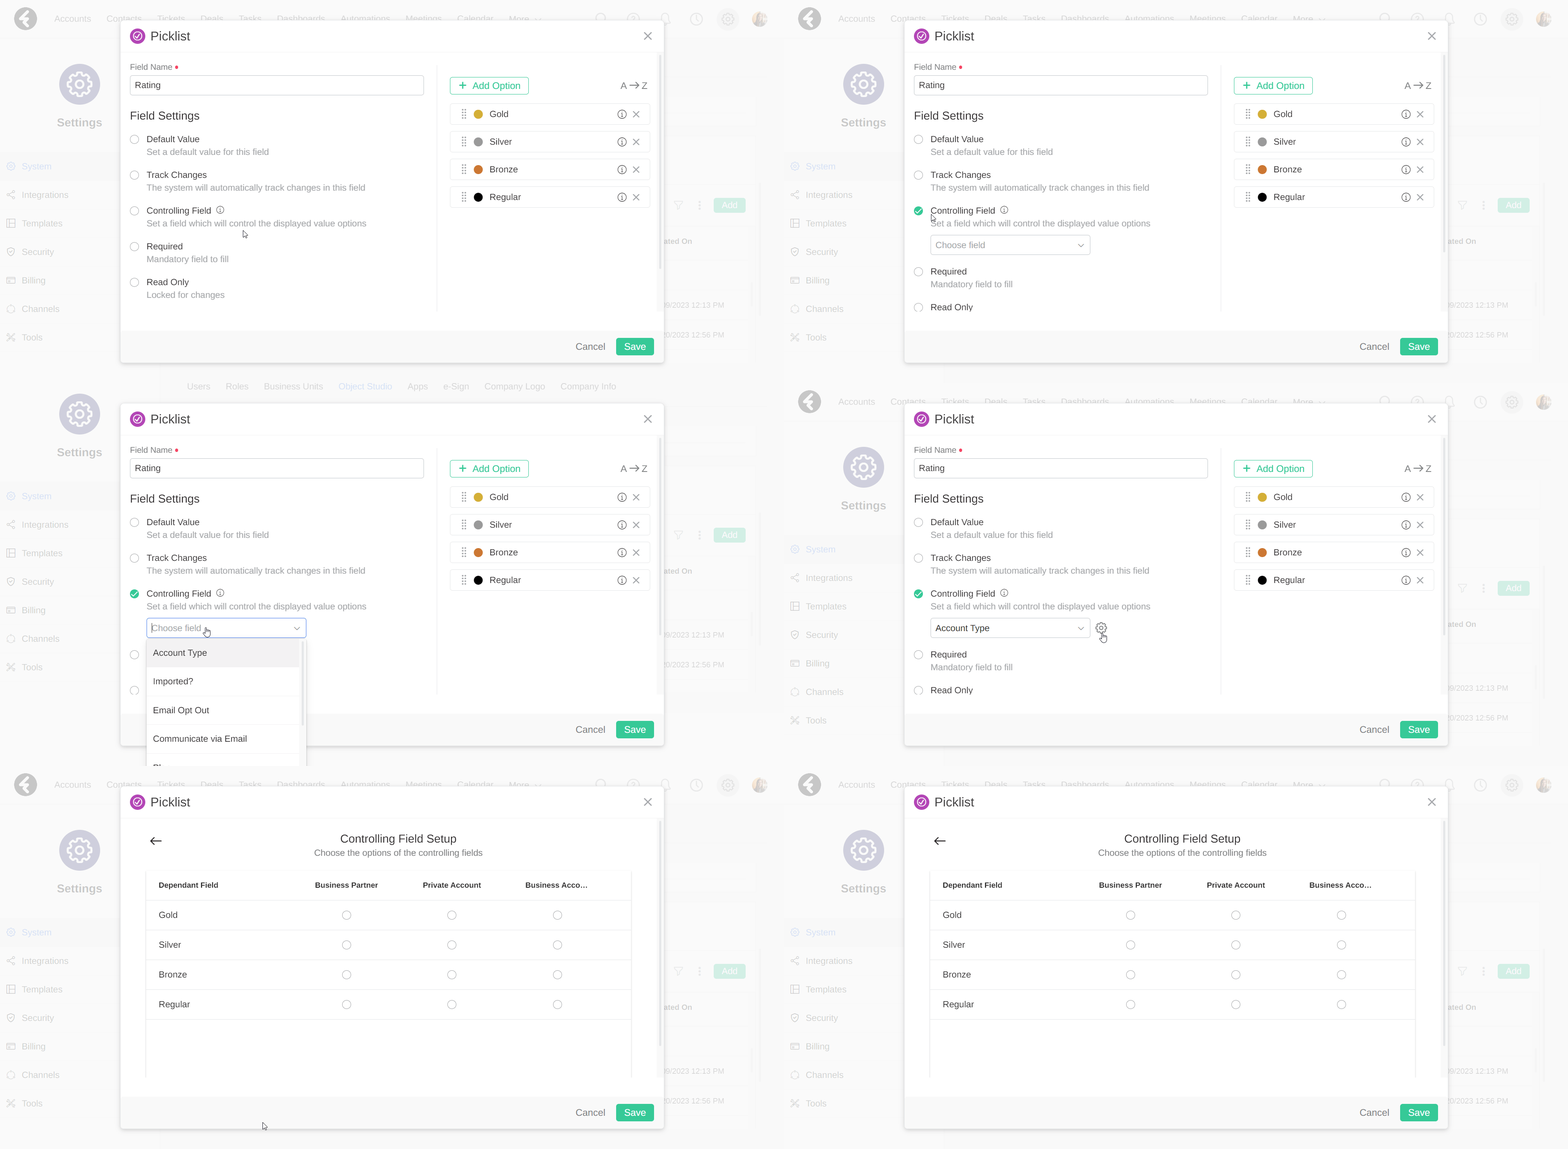
To make your picklist dependent on another field, first check the controlling field option. This will open a dropdown list where you can choose the controlling field. This field must be a picklist field, and thus only the picklist fields of the object will be available in the dropdown list.
To demonstrate, let’s use the account type to control the available options in our newly created Rating picklist. First set the Account Type field as your controlling field, and then click on the settings icon to its right to set the dependencies.
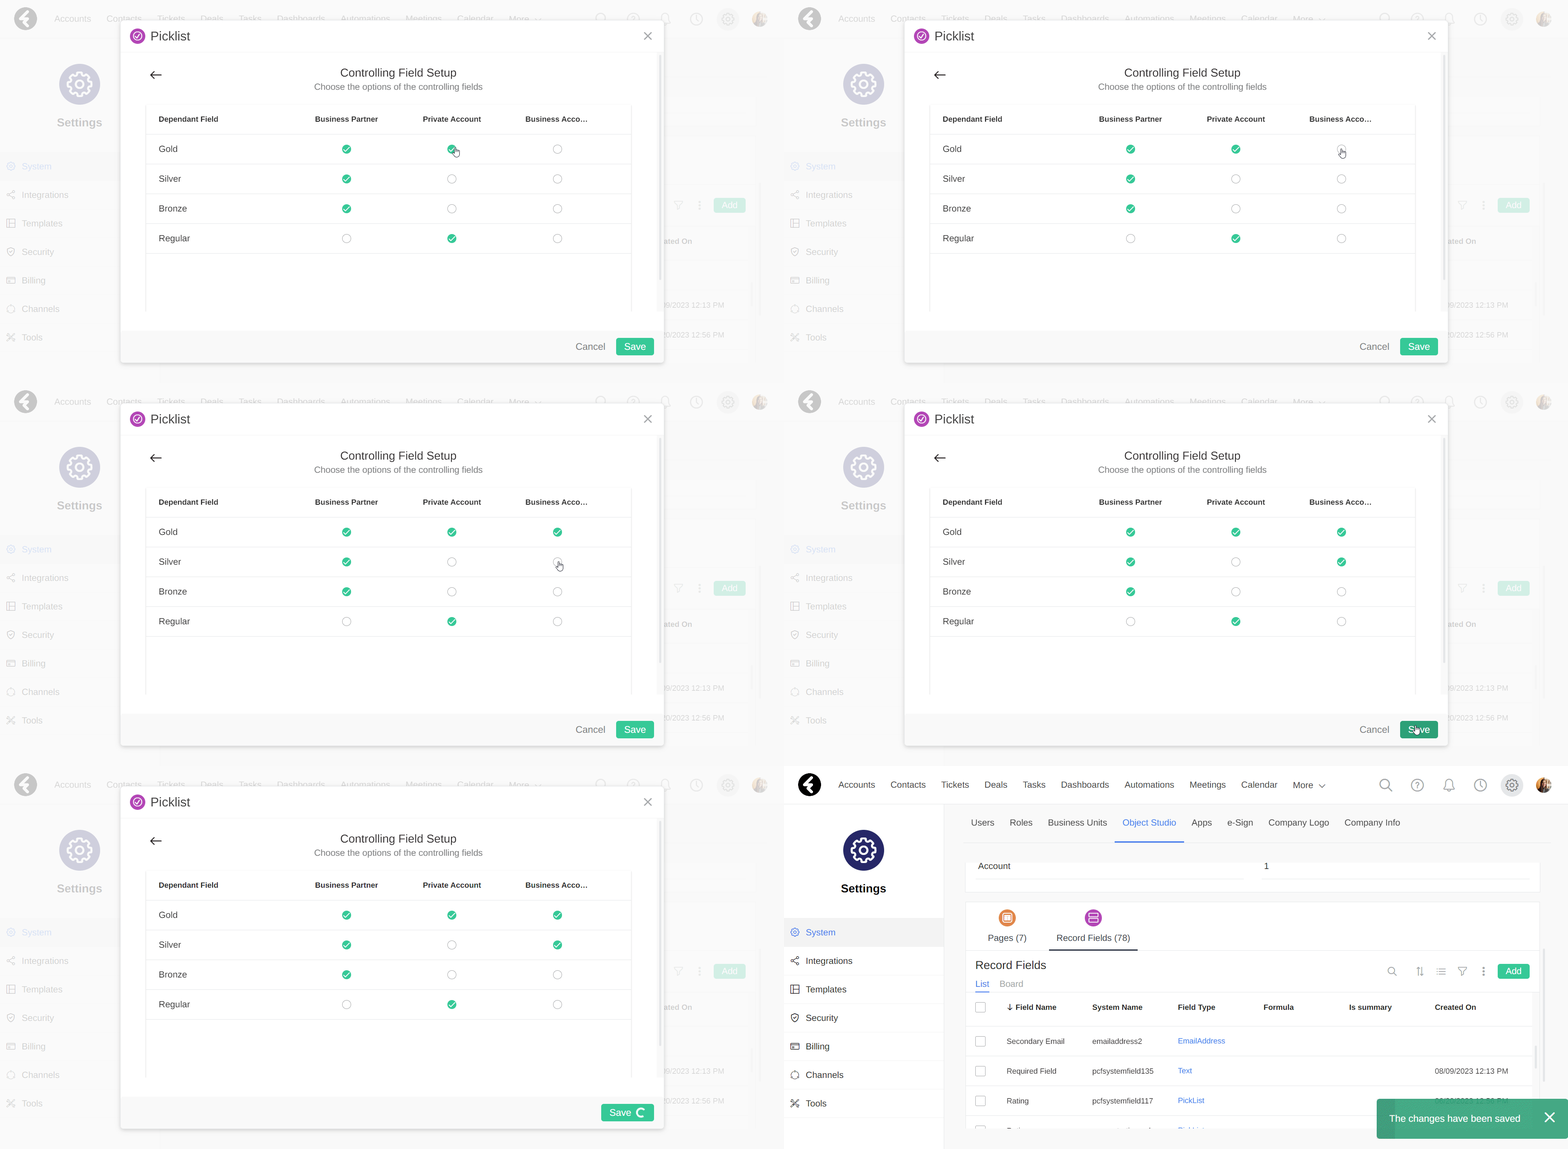
This will open the Set dependencies page. The horizontally displayed values are the options of the controlling picklist, while the vertical values are the options of the dependent picklist. By checking a circle, you will set the dependent value to be displayed when the controlling field is equal to the controlling value. For example, you can check the circles corresponding to both the Business Account controlling value and to the Gold and Silver dependent values. Now when an account’s type is set to Business Account, the options available will be Gold and Silver.
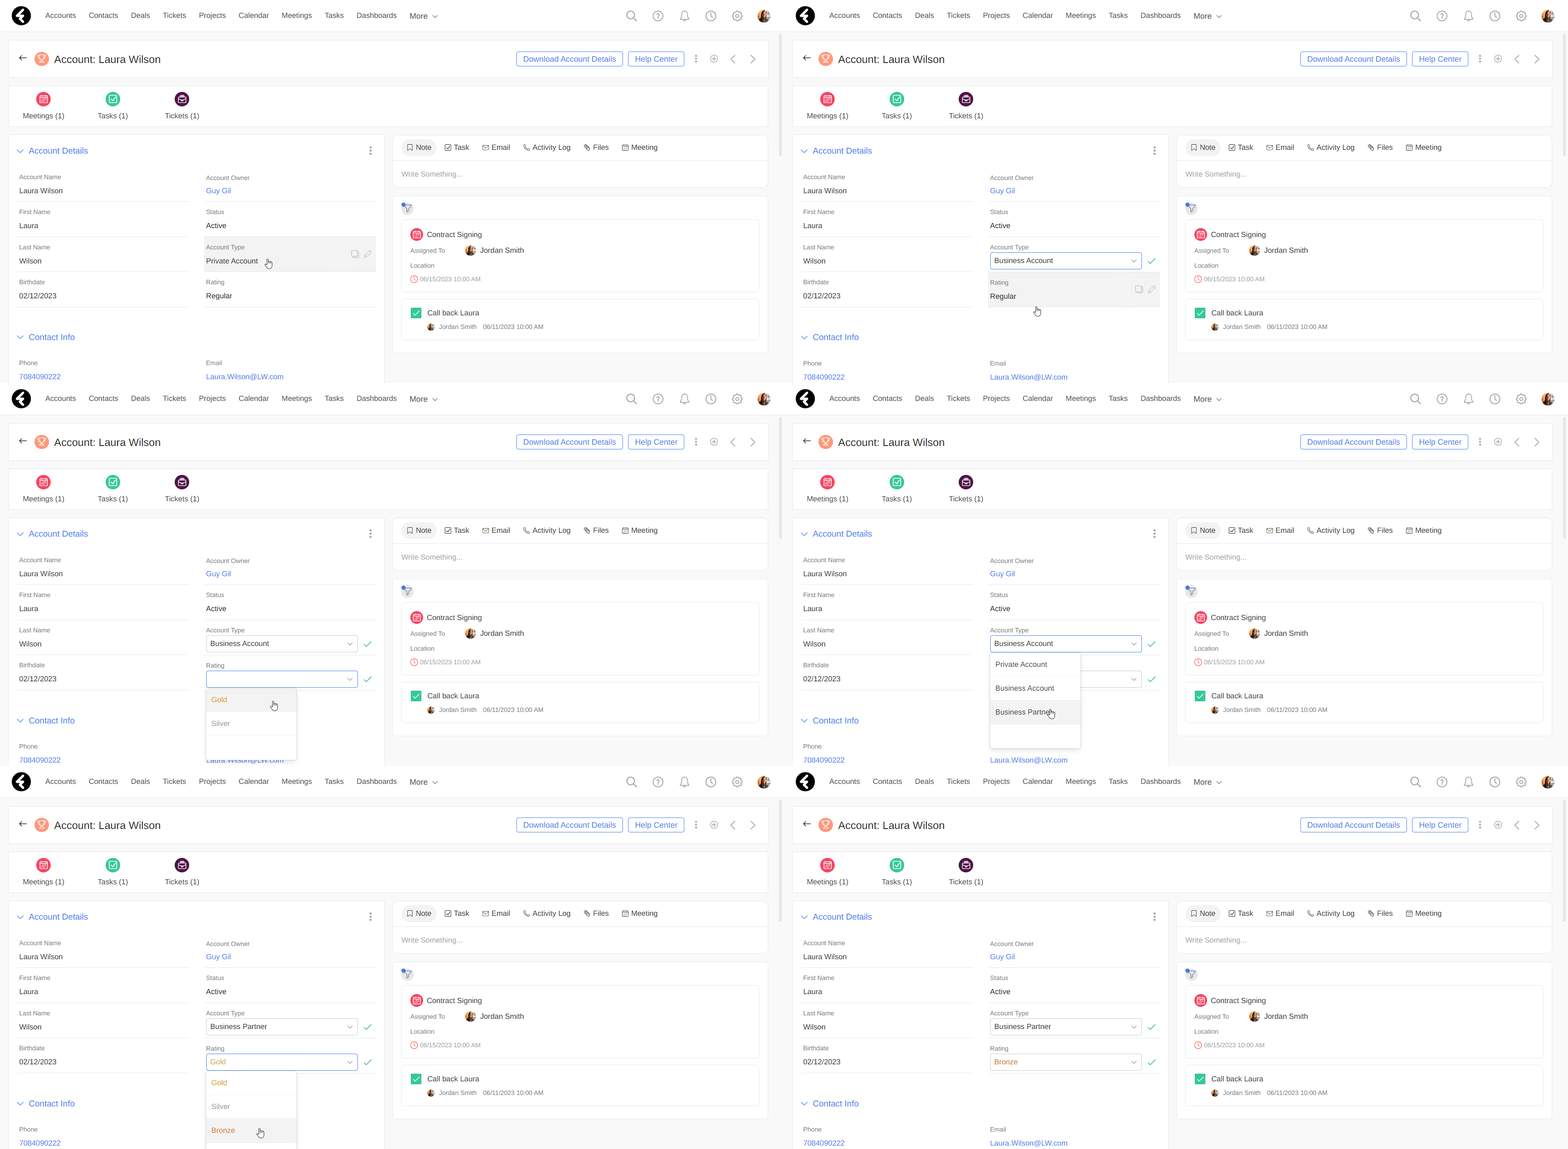
Now the options which will appear under the Rating picklist are dependent on the value of the Account Type picklist, and will change dynamically based on the selected account type.
Once you set your options and controlling field, you may wish to set other settings, such as a default value or track changes. To learn more about these options click here.
Be sure to click Save once you finish adding or editing a picklist field.