Conditional visibility
You can use the visibility settings to control which information is displayed on each page, based on a record’s individual data. In this way you can make sure not to show components, form sections, or fields which are not relevant to a record.
Filtering
The visibility of an item depends on the conditions you set in its filter. Filters are dynamic, so that changing the field a condition is based on will automatically update the visibility.
Adding and editing filters
You can create as many or as few conditions as you’d like.
To start, navigate to the page component, section or field you’d like to add a filter to. For instructions on navigating to a page, click here. For instructions on navigating to a specific section or field, click here.
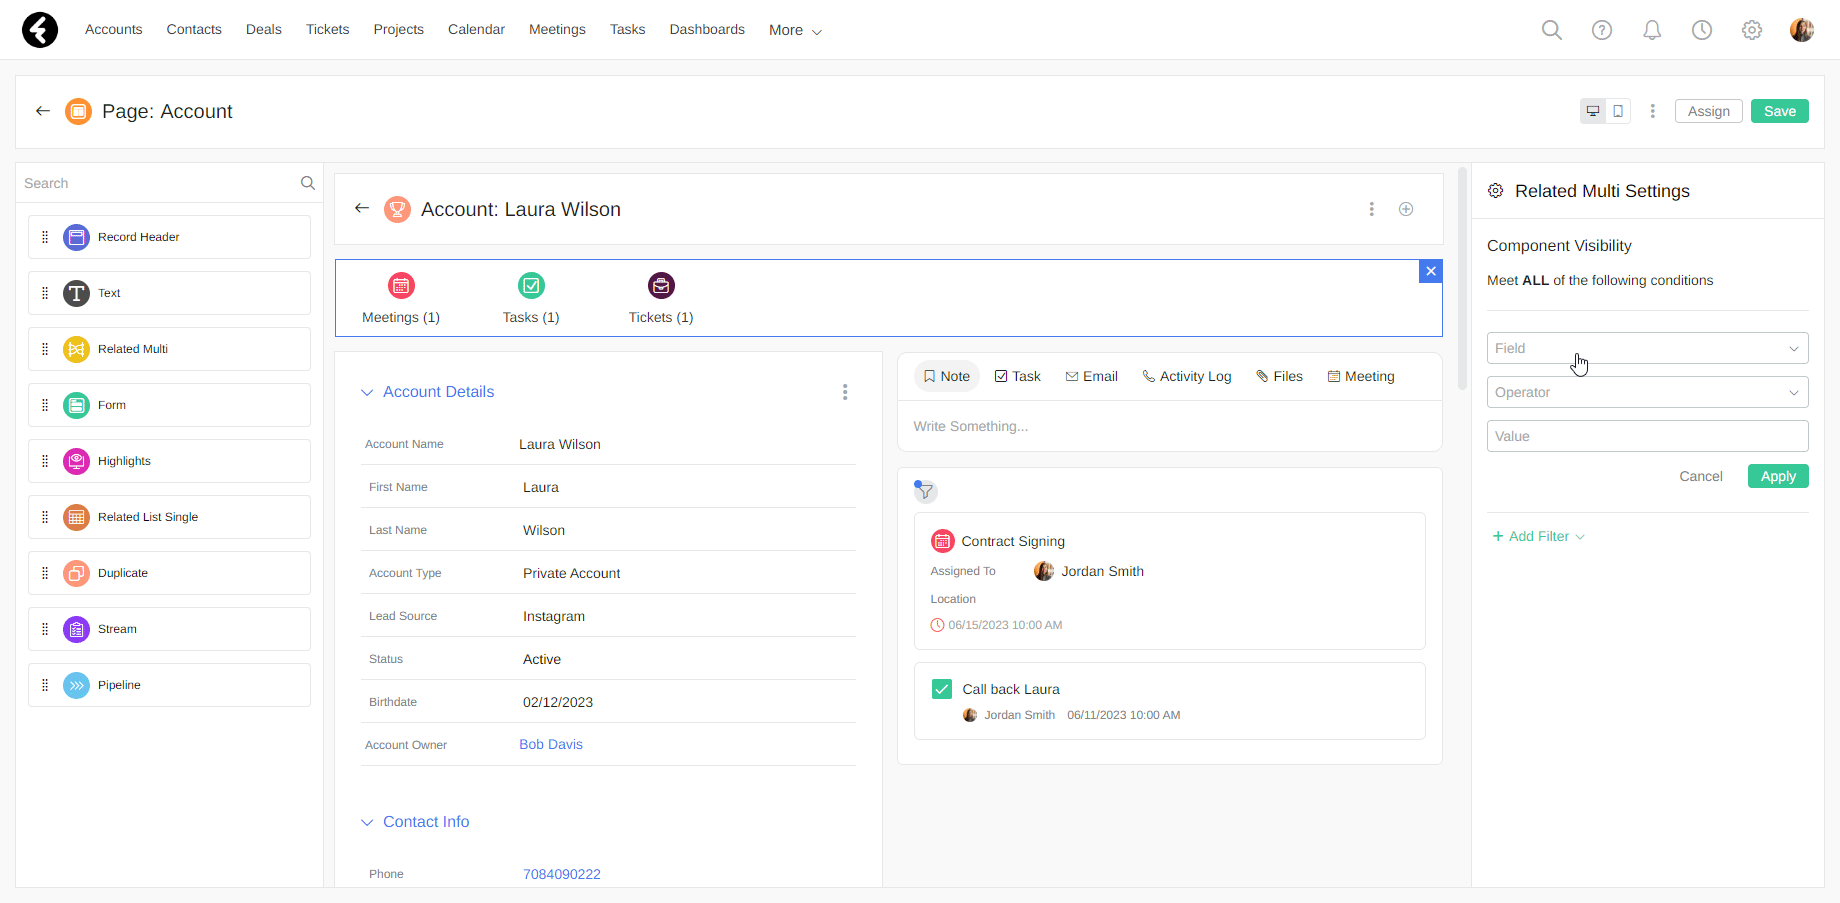
Now that you’re on the relevant page, click the Add Filter option under the visibility settings on the right. This will open the Field, Operator, and Value options. Use the Add Filter button to add more conditions.

Each condition has three boxes:
- Field: Contains a dropdown list of all the fields and related fields of the current object. Choose the field which you would like to base your condition on, such as Status.
- Operator: Contains a dropdown list of operators, which will dynamically change based on the field type of the field you chose. In this way, operators which are relevant to numbers, such as Greater than, will only appear for number fields, and so on. The operator sets the method by which the field and value will be compared, such as Equals.
- Value: The value’s type will automatically correspond with the field type of the chosen field. This means that a text box field’s value will be open text, number field’s value can only be set to a number, a picklist field’s value must be one of the picklist options, etc. For operators such as Is not empty, the value field is not relevant and will thus disappear. The value will be compared to the field using the operator, such as the Active status option.
Each box is required, and must be filled in before applying a condition. To apply a condition, click the green Apply button underneath the boxes. This will check that the condition is valid and temporarily save it. Your new condition will now appear as a box in the filter menu.
To edit an existing condition, simply click on it. If you don’t want to save the changes you’ve made, click the Cancel button found next to Apply.
You can delete a condition at any time by hovering over it and then clicking the x which will appear on its right.
Filter types
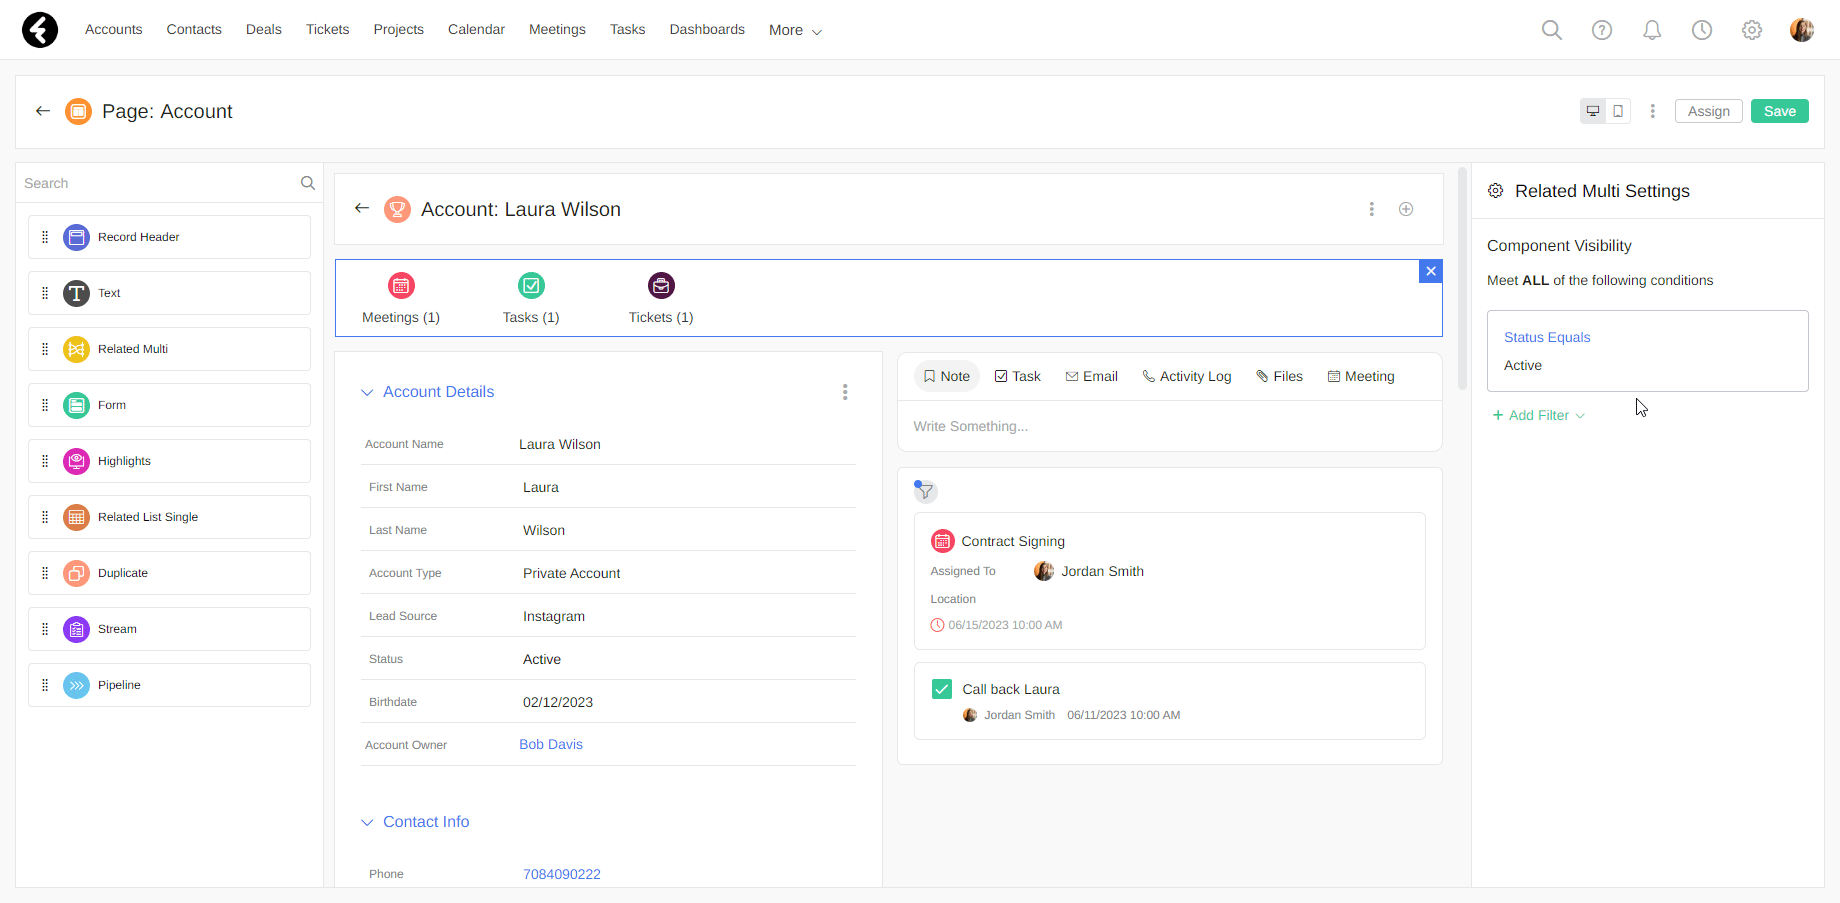
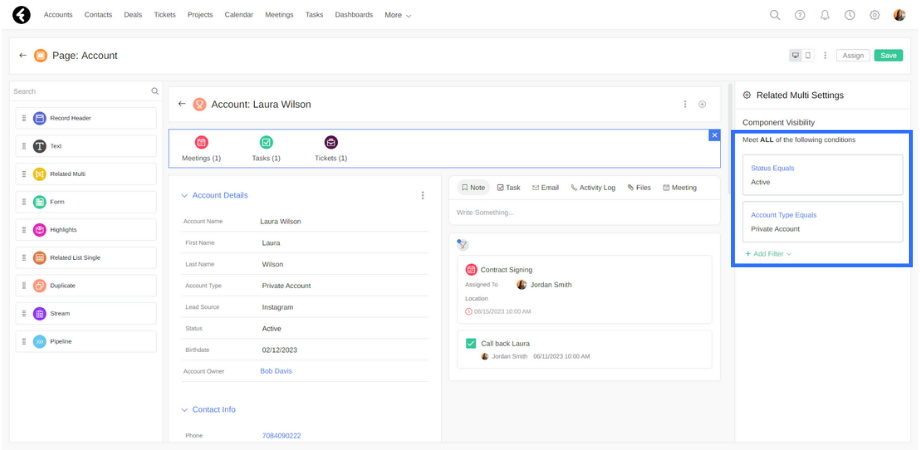
By default, conditions will be opened under the Meet ALL of the following conditions heading. This means that every condition you save will need to be met. For example, if you have the conditions Status Equals Active and Account Type Equals Private, only items which meet both these criteria will be displayed.
You can also choose to add a group filter. This will let you create a group of conditions where only one must be met to activate the filter. To add a group filter, use the v down arrow to the right of the + Add Filter, and then click Add Group Filter. This will open a new condition under the heading Meet ANY of the following conditions.
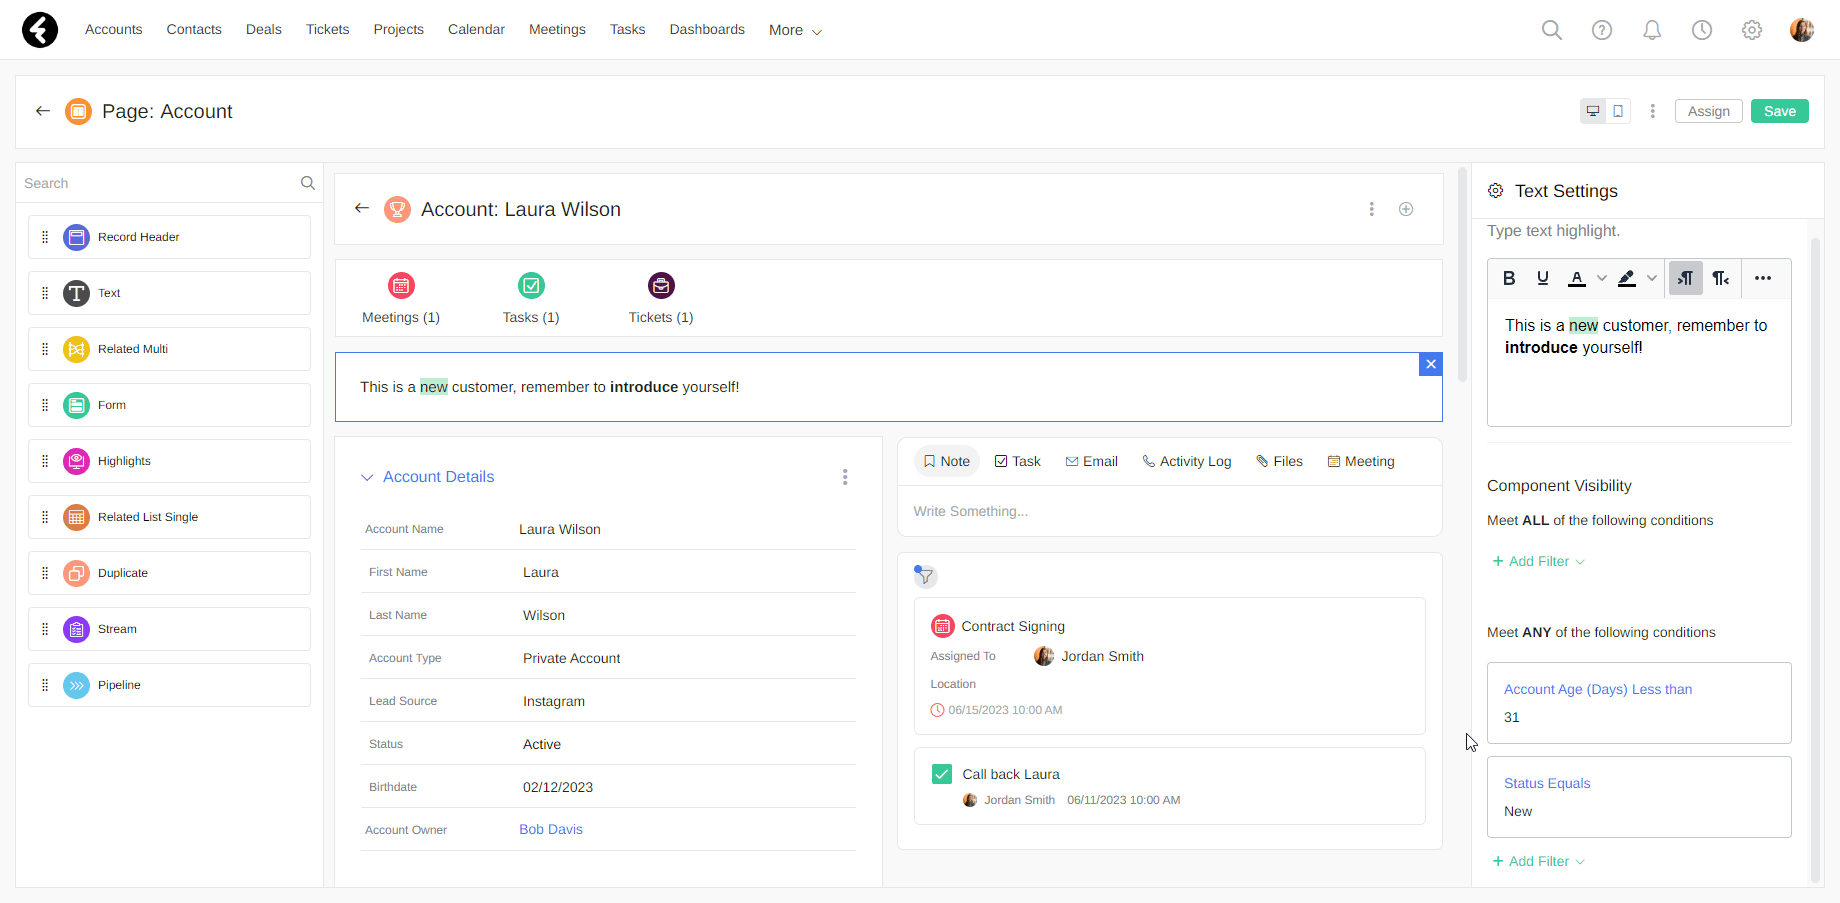
Any conditions you add under this heading will be grouped together, and one of them will need to be met for the filter to be applied. For example, you can set two conditions, one which checks if the account age is less than 31 and one that checks if the account’s status equals new. If at least one of these conditions are met, the item will be displayed

You can add multiple groups of filters using the Add Group Filter button. Each of these groups will function independently, and require that at least one condition within each group is met.
Component visibility
You can choose when a component will be displayed based on filters. Component visibility filters can be set on every component type. Each component can have as many or as few filters as you would like, and you can choose whether all or any of the filter conditions must be met.
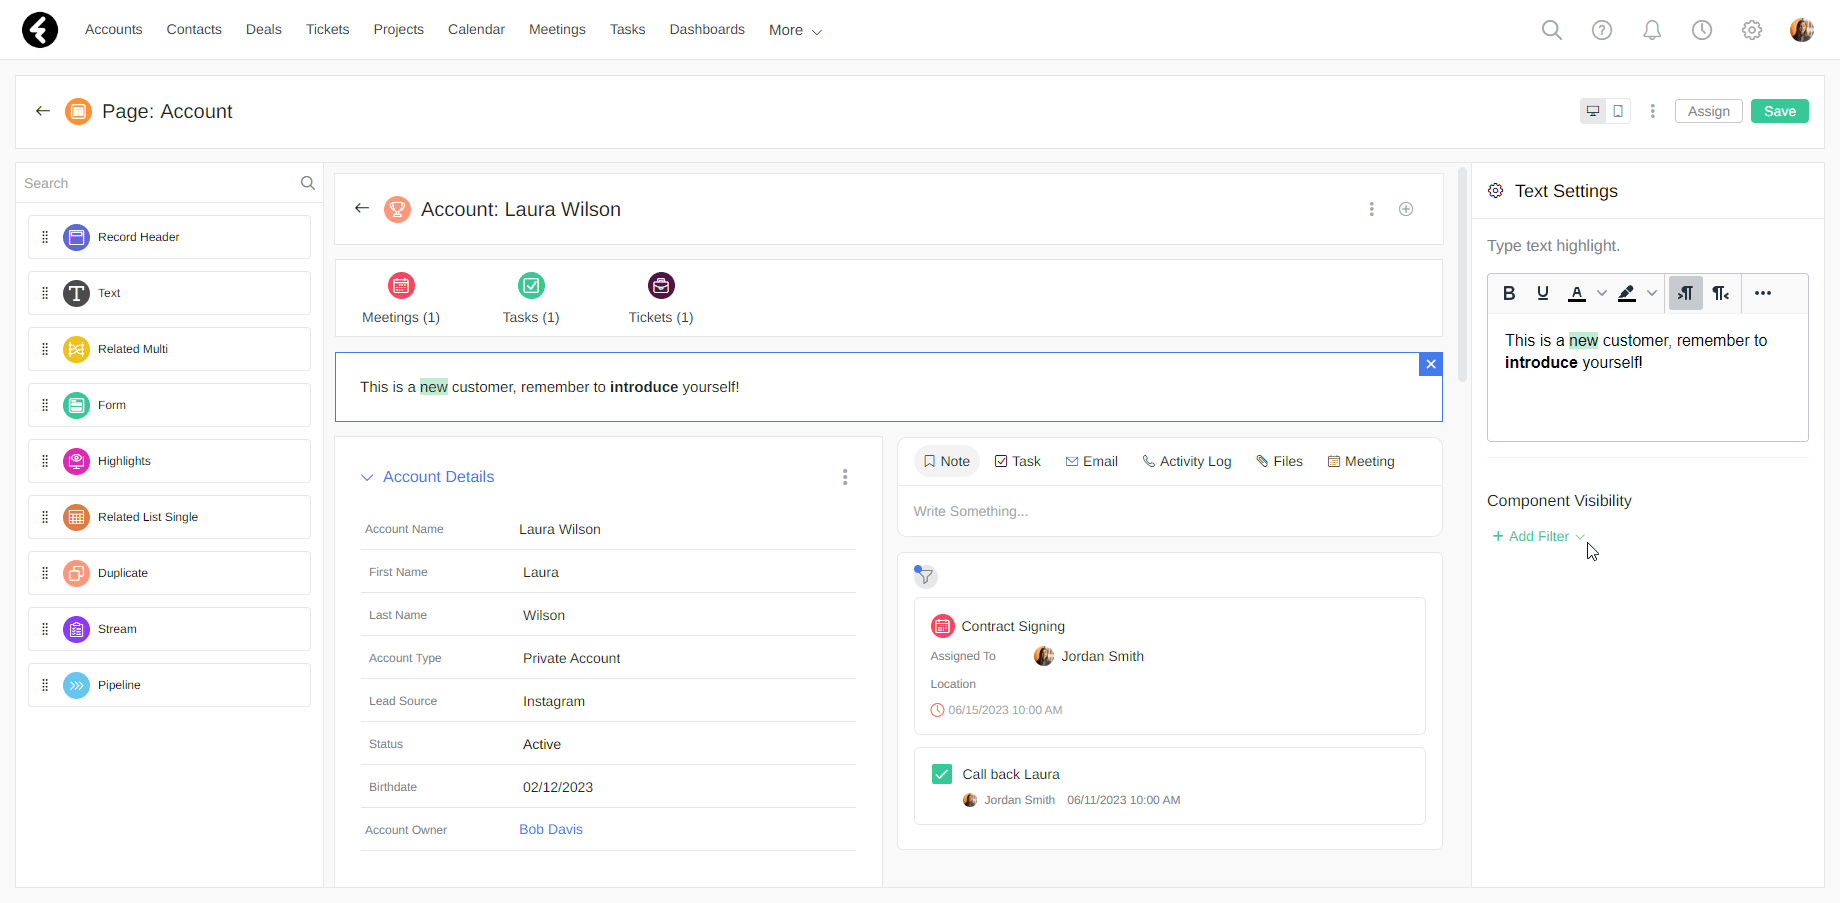
For example, you can create a Text component containing specific instructions for accounts which have been created in the past 30 days.
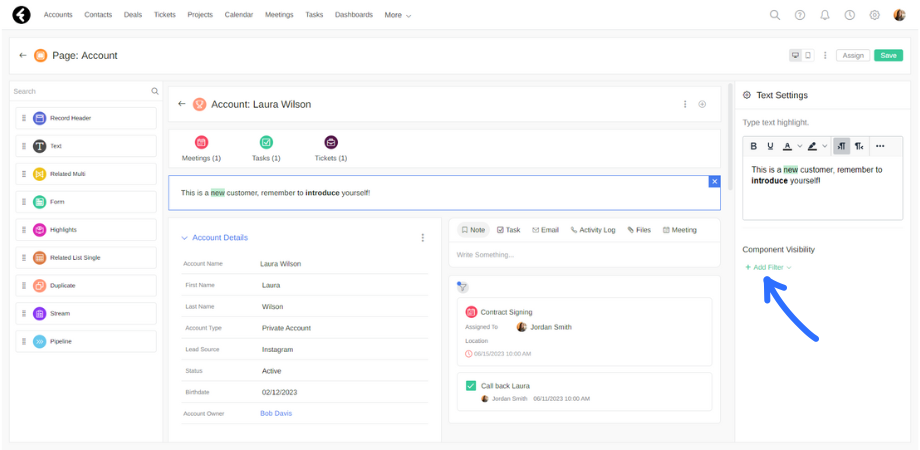
To start, create a text component. A pop up will open to the right with the Text Settings. Here you can enter the text you would like to display. Next, click + Add Filter under Component Visibility. Here you can set conditions which a record will have to meet in order for this specific component to be displayed on a record’s page.
Continuing the above example, set the condition as Field: Account Age (Days), Operator: Less than, and Value: 31. Next, click Apply under the filter and Save in the top right corner. Now every account which was created in the past 30 days will display your text box within this Page, while any other accounts will not display this text.

Section visibility
The section visibility settings can be found at the bottom of the section settings. By setting the visibility, you can decide when a section will be displayed based on preset conditions. The visibility is dynamic, meaning if you change one of the values of a condition, the section will appear or disappear accordingly.
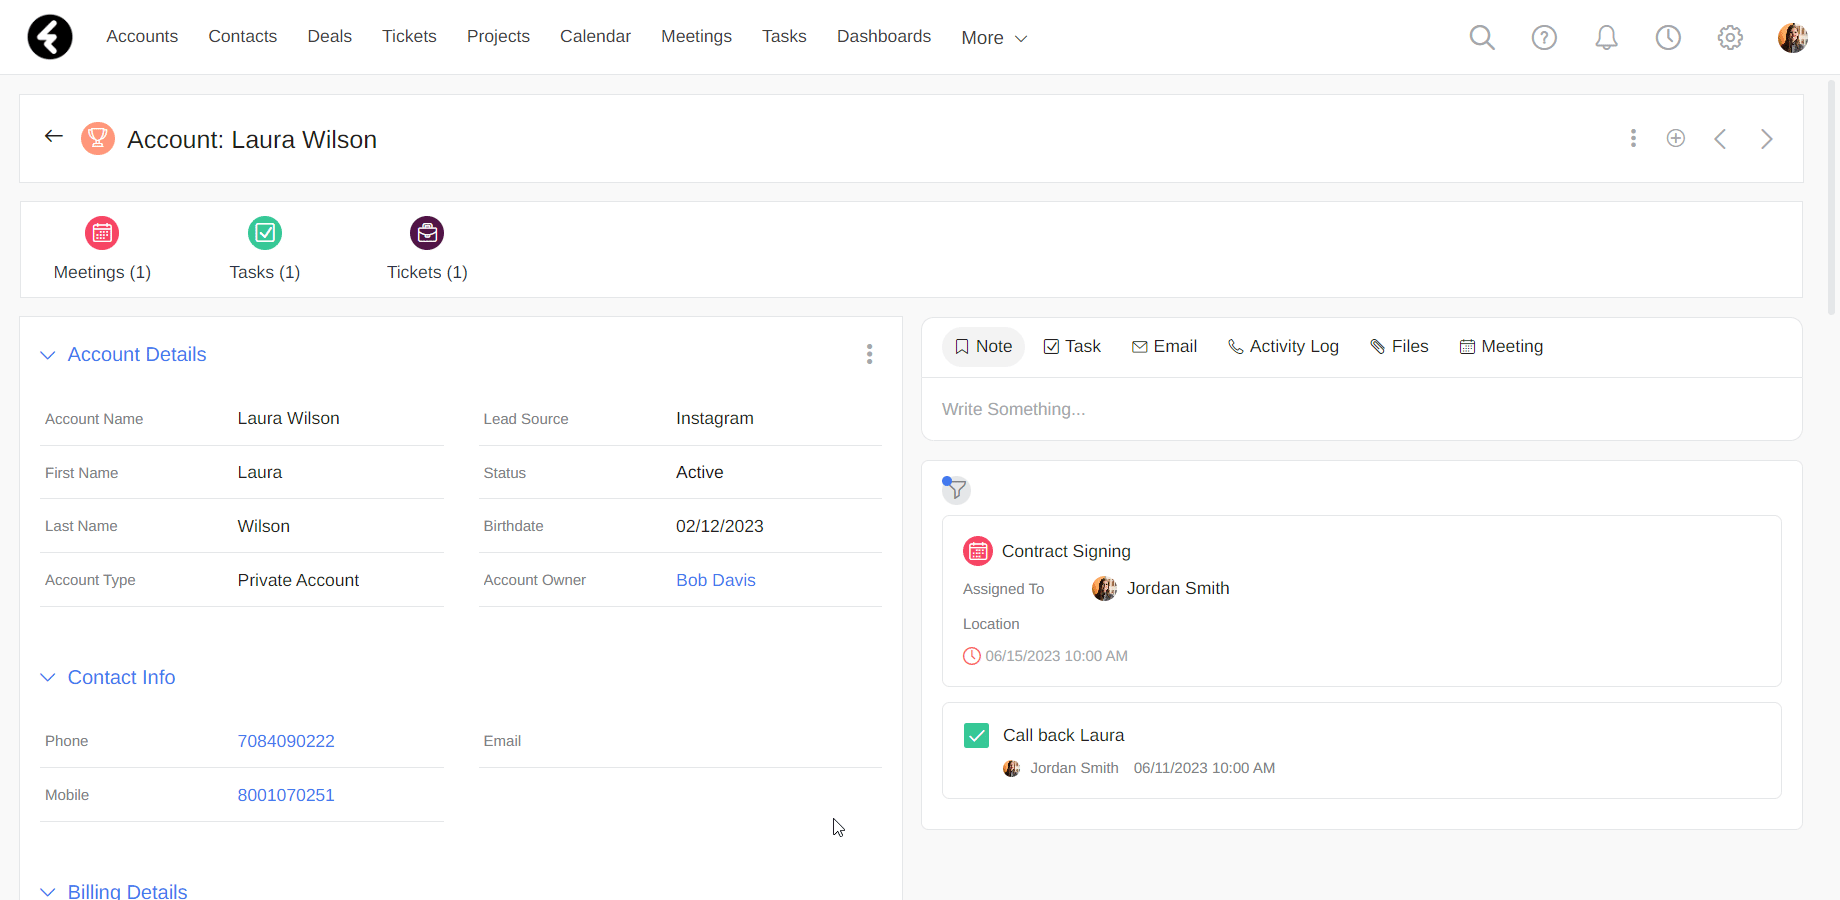
Let’s say that you want to display a billing section, but only for active accounts. You can do this easily using the section visibility. To start, create the billing section. Next, click on the section and use its section visibility settings. Click the Add Filter button to define your condition. Start by setting the field to Status. This will base your filter on the status field.
Next, set the operator to Equals. The equals operator will now compare between the status field and the selected value. The value type is based on the type of the chosen field. Because status is a picklist field, you’ll have to choose one of these picklist options as the value. Choose the Active value to have your filter check if an account’s status equals active, and then click Apply.
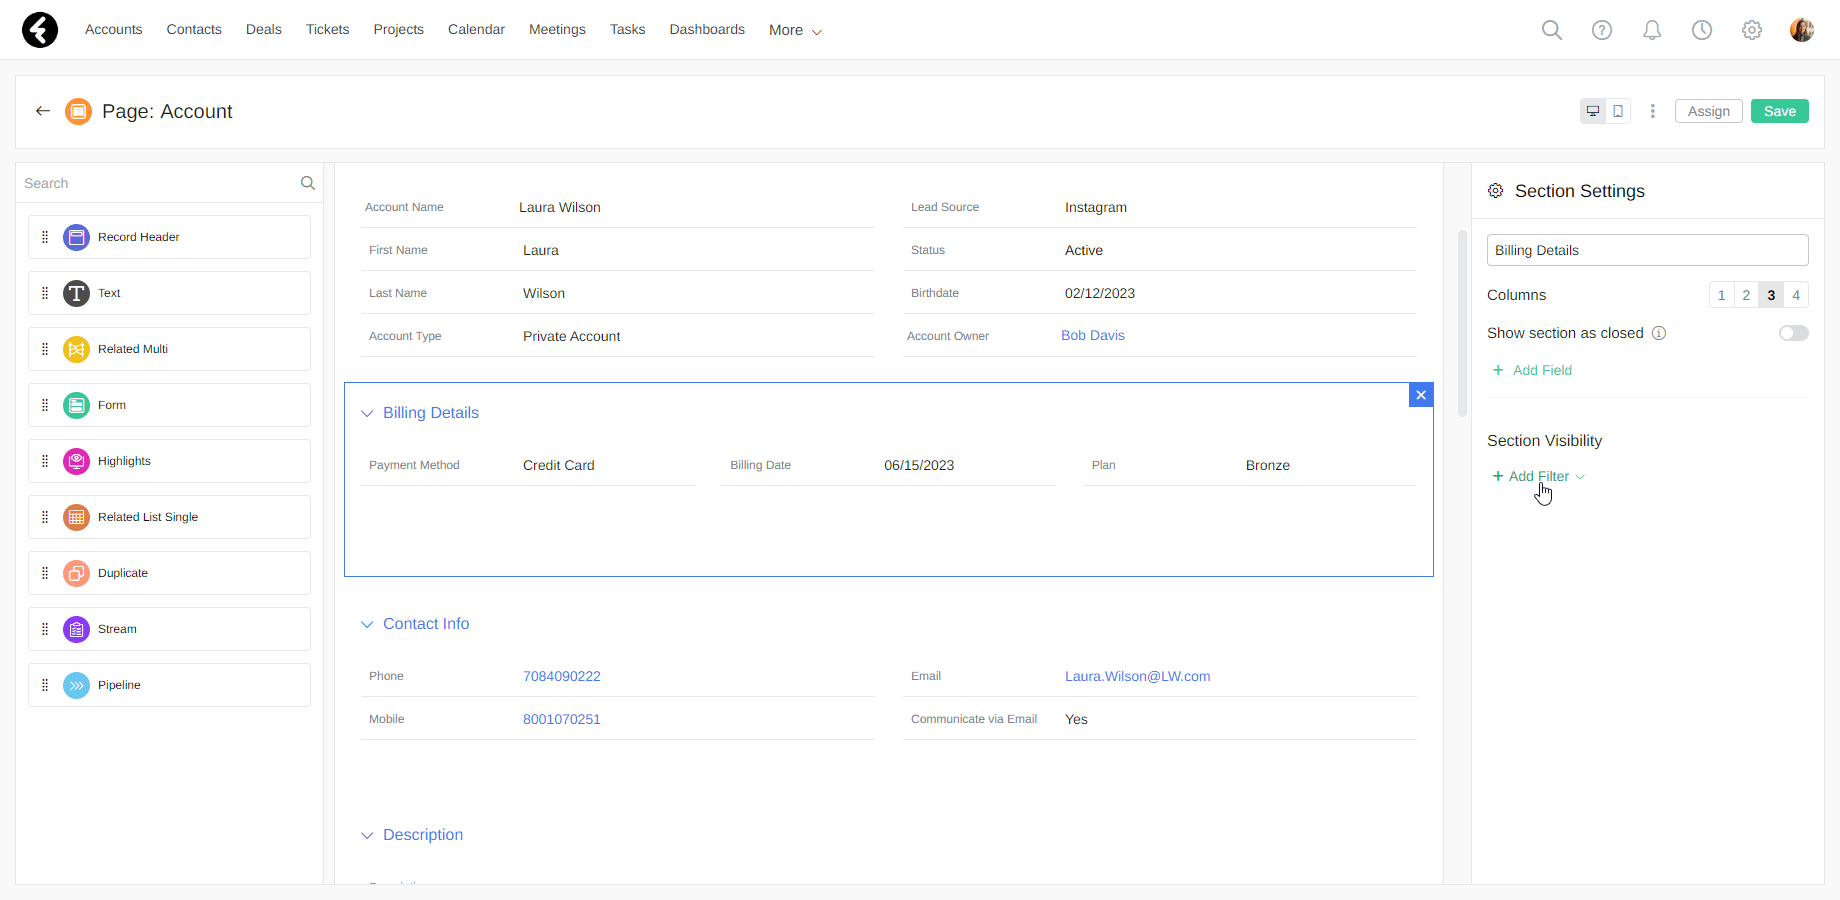
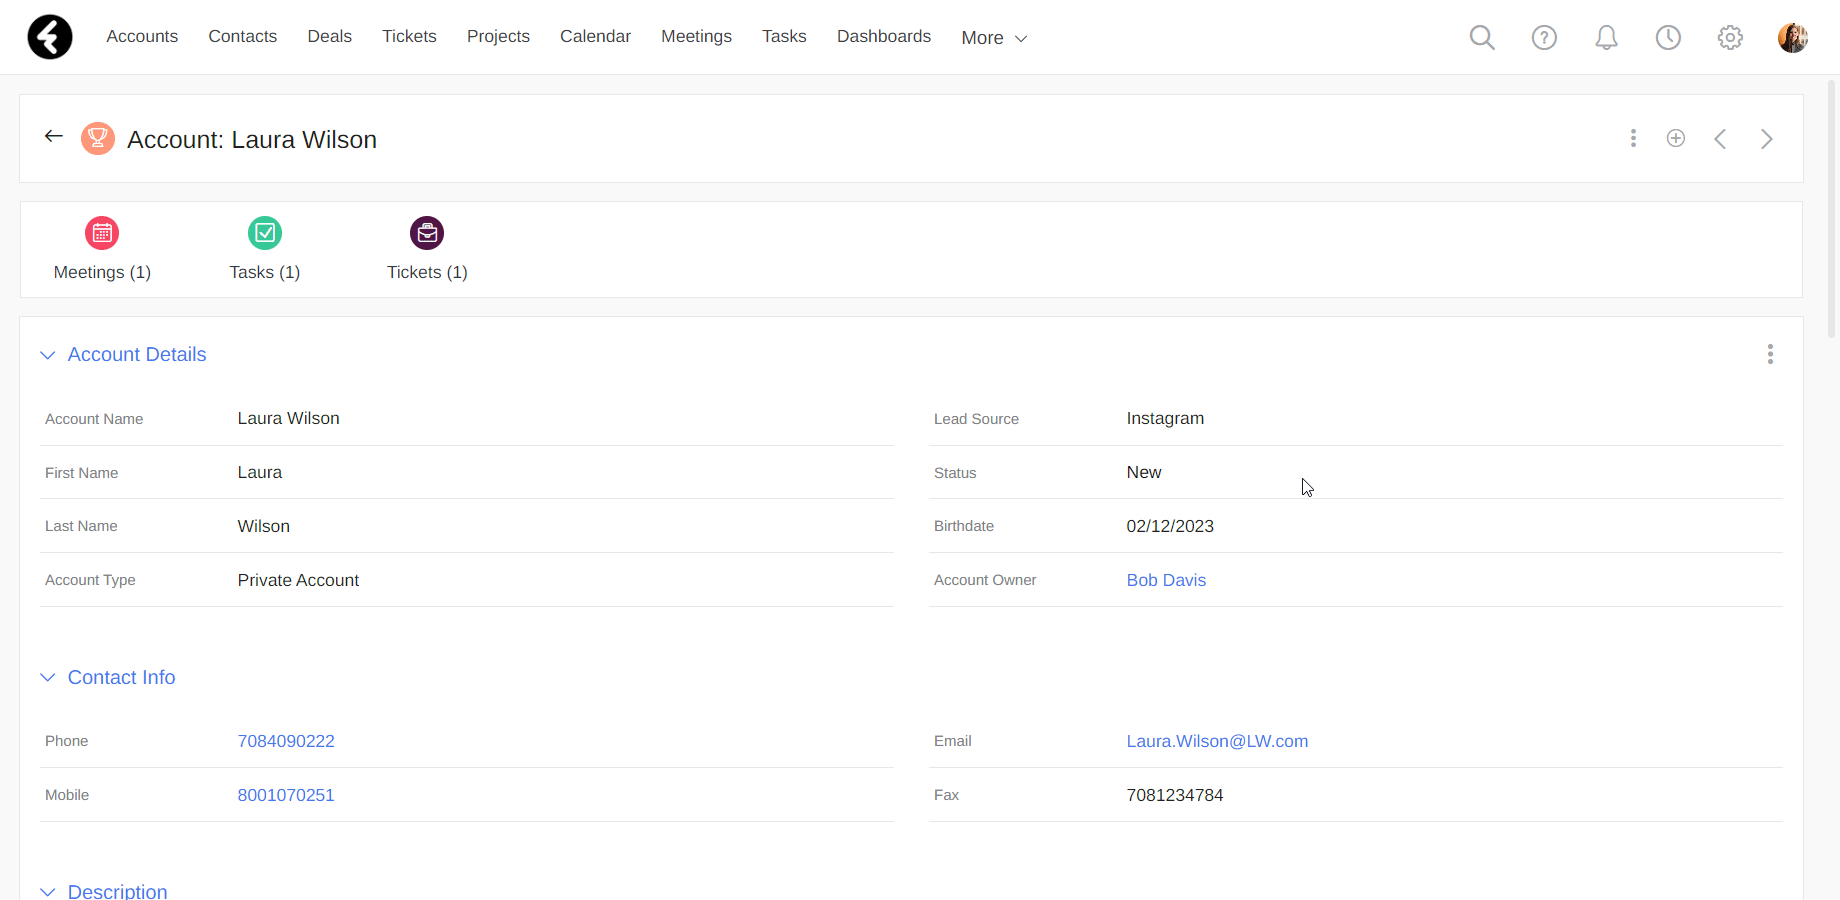
Your billing section will now only appear once you set an accounts status to active. If you switch an accounts status back to new, the billing section will be hidden again.
Field visibility
You can choose when you would like a field to be displayed using the field visibility section of the field settings. For example, you can create a Communicate via Email field which will only be displayed if the Email field is filled in. This way, you won’t have a request to communicate using emails if the account in question has not provided an email address.
To start, select the field which you would like to control the visibility of, in this case Communicate via Email. Click on the field within the relevant form to open the field visibility settings on the right of the page. If you’re not sure how to access a form, see the following article.
Next click the Add Filter button to set your conditions. Start by selecting the Email field, which this filter will be based on. Then choose the Is not empty operator option and click Apply.
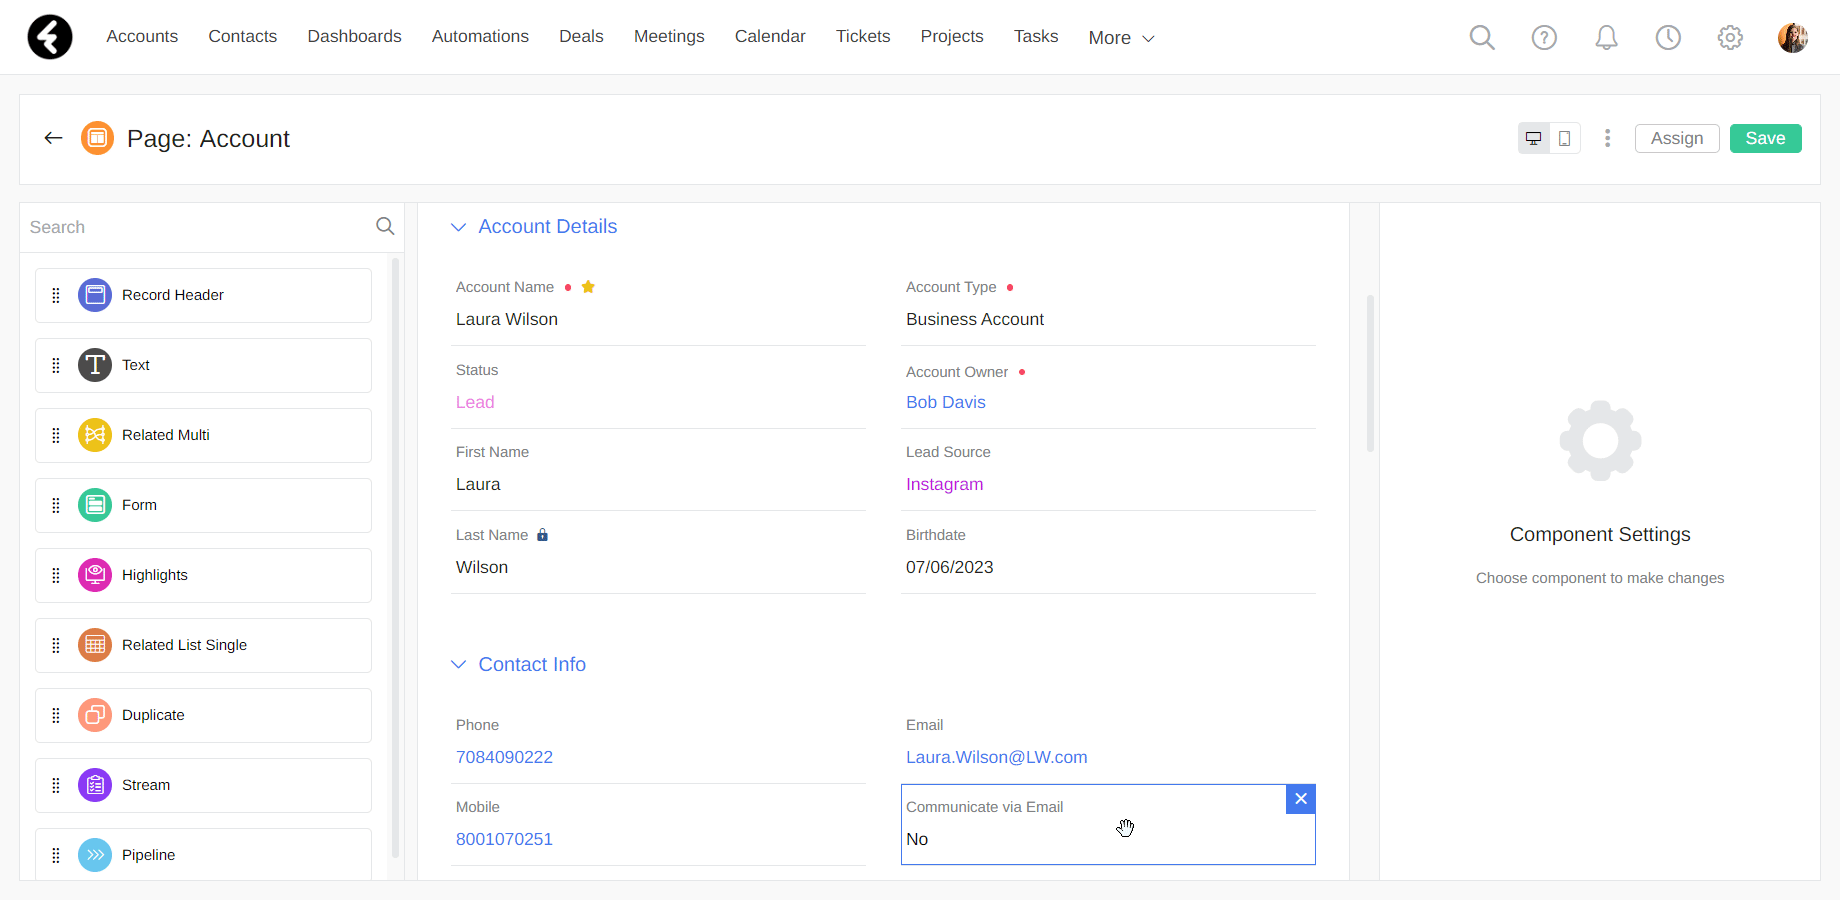
Now the communicate via email option will only be displayed for the accounts where the option is relevant, and your form will only include useful fields.
Required
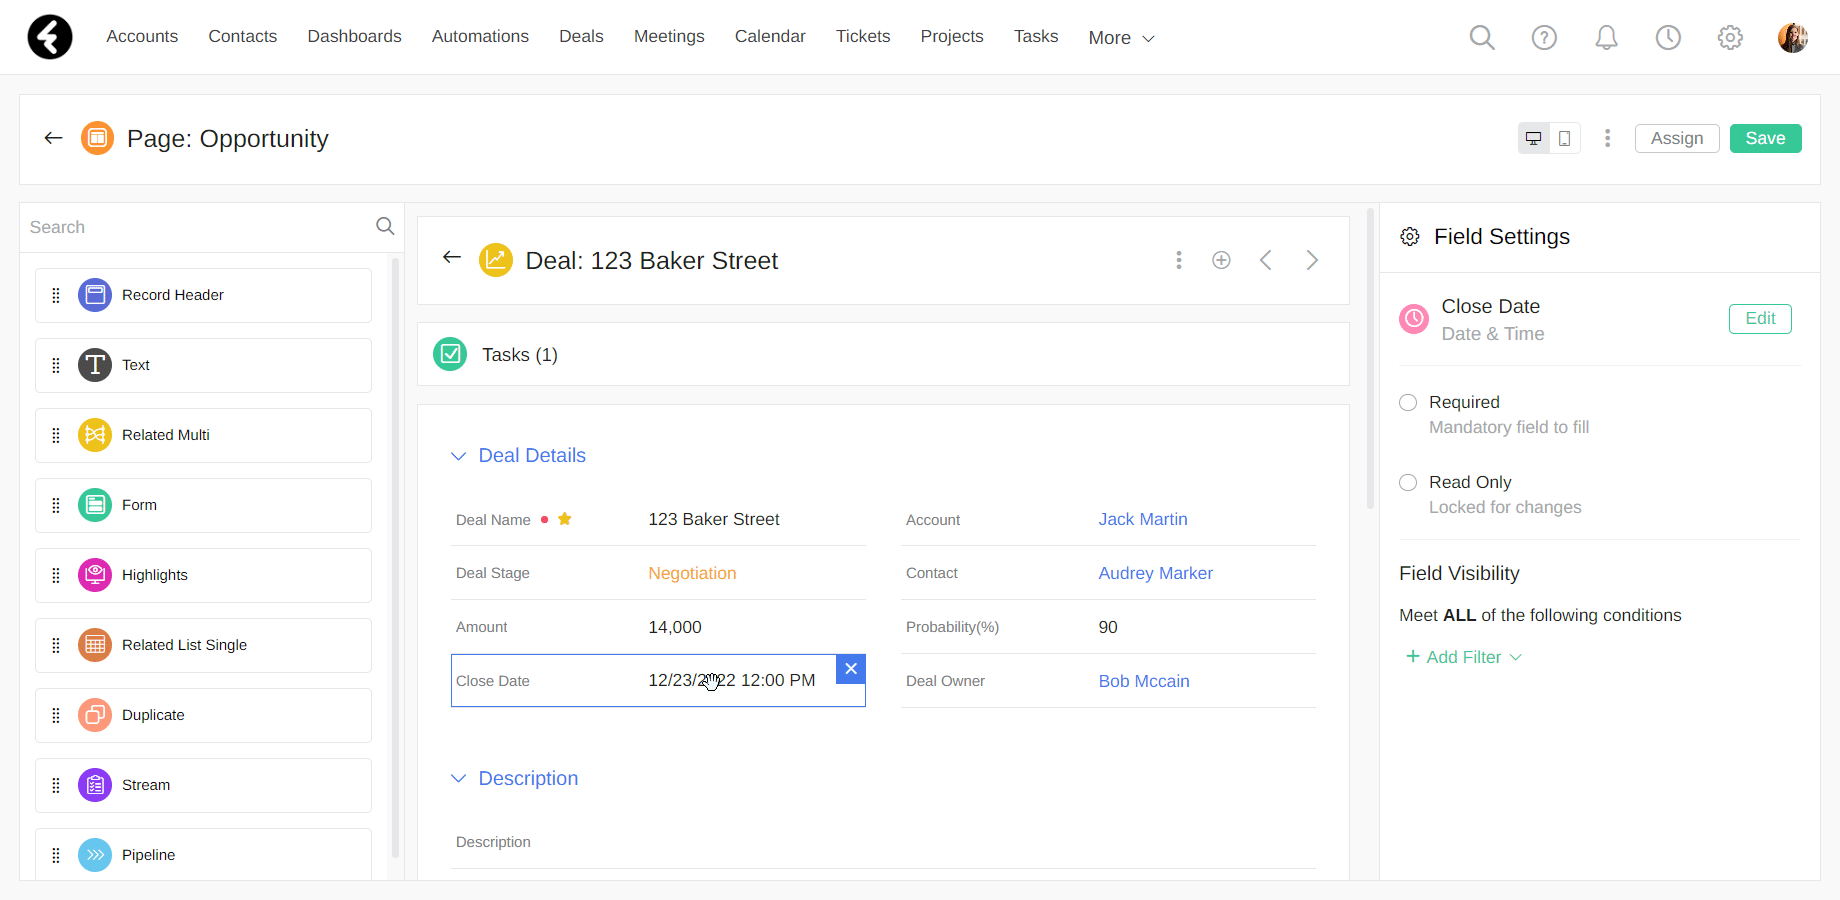
Within the field settings, you can choose to add conditional filters to the Required option of a specific field. In this way, a field will only be required when the condition is met. For example, you can set the Close Date field of the Deals object as required, but only when a deals stage is either Closed - Won or Closed - Lost.
To do so, first go to the Close Date field within the Deals page layout. See our forms, sections, and fields article for more details on how to do this.
Next check the Required option for this field, and then click the arrow to the right, which will open the filter options. Now add your new condition. Select the Deal Stage field, set the operator to Equal, choose both the Closed - Won and Closed - Lost values, and click Apply. The Close Date field will now be required whenever the Closed - Won or Closed - Lost statuses are selected.
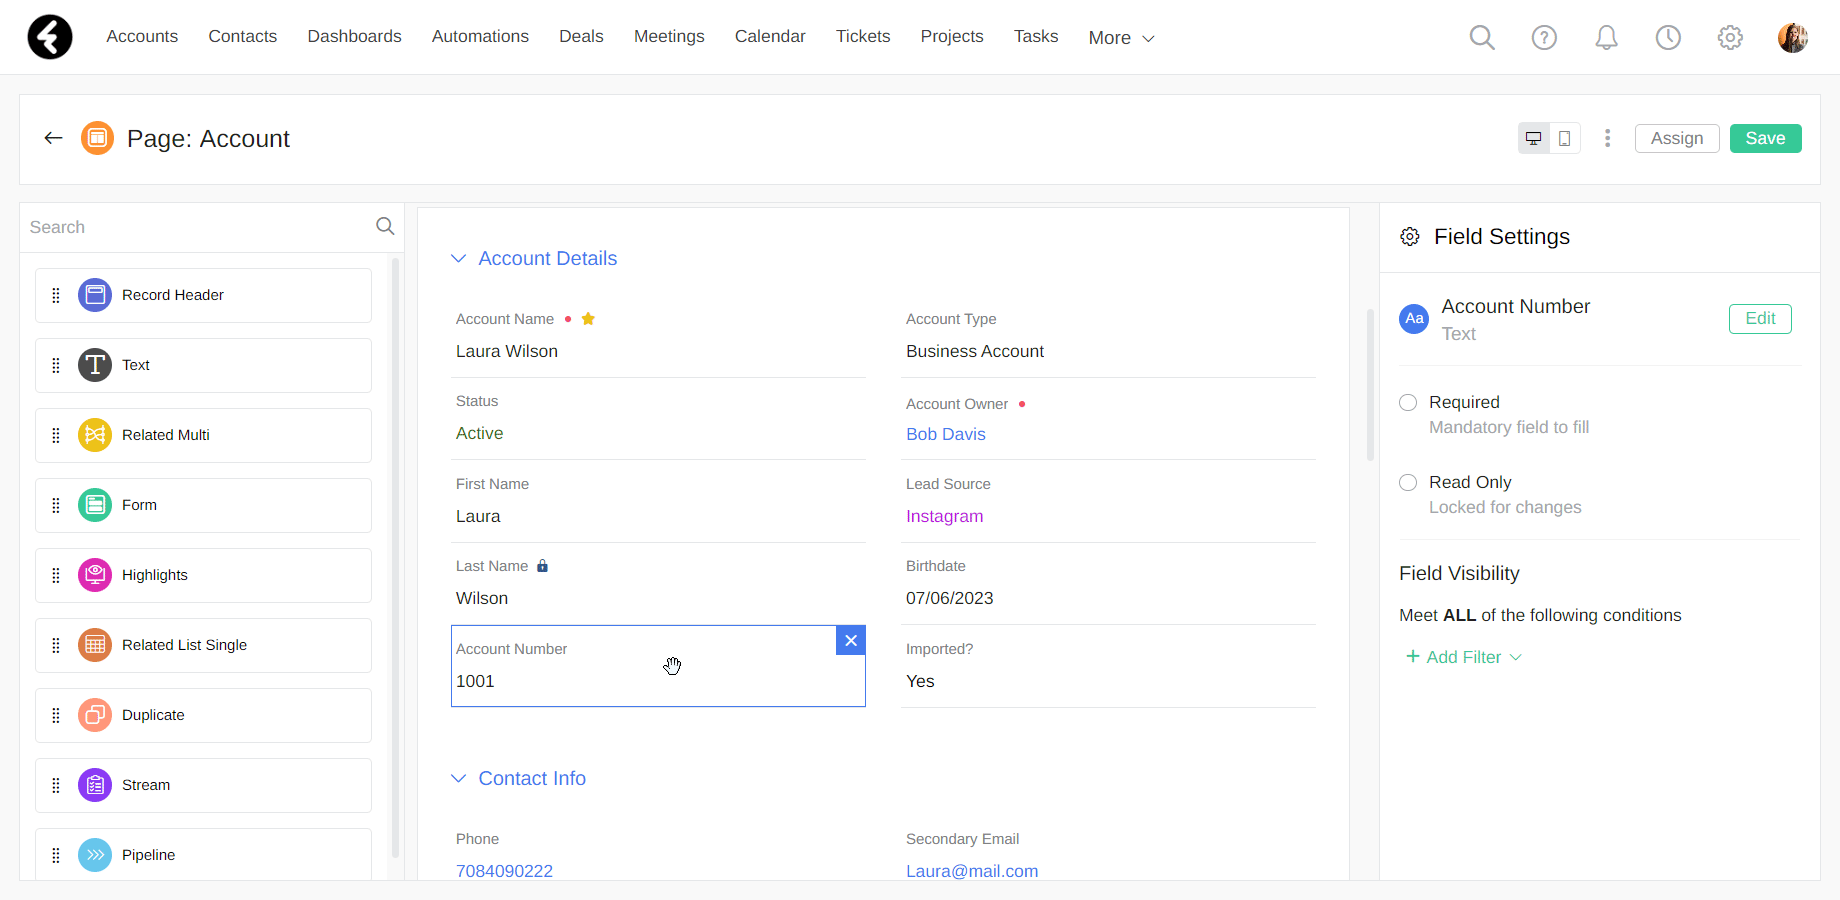
Read Only
You can also add filters to read only fields. In this way you can control when a field is editable. For example, you can use a custom Imported? field to lock the Account Number field. That way, the account number of imported accounts won’t be changed.
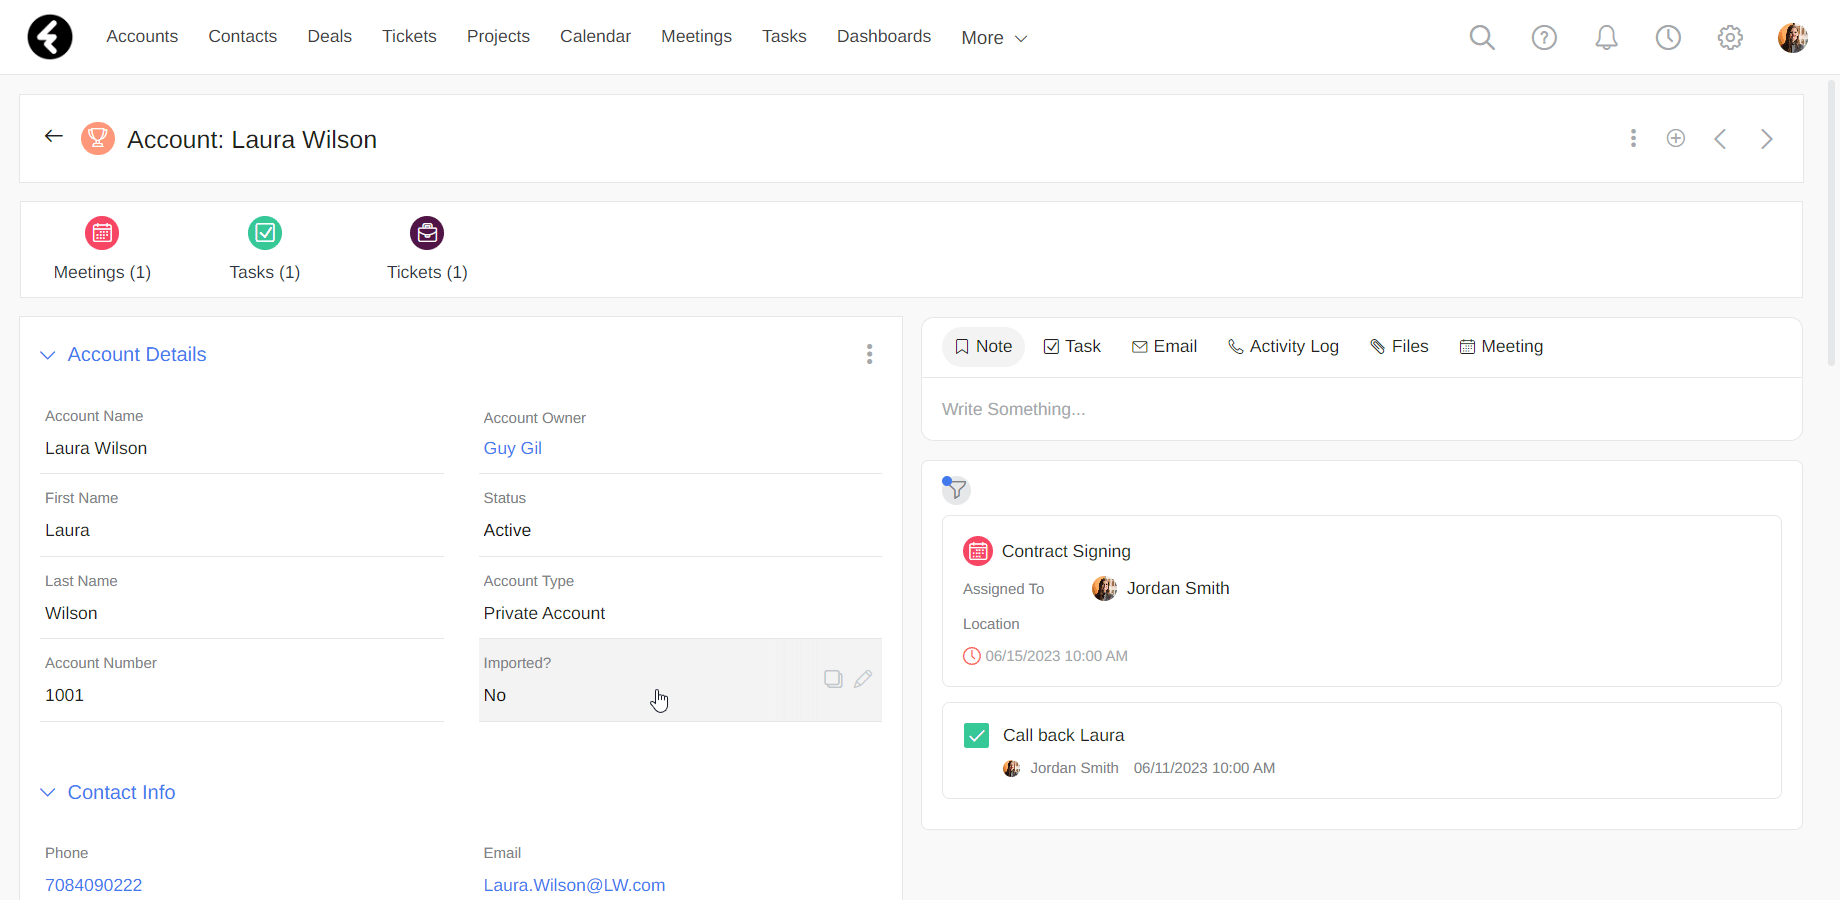
To start, choose the Account Number field from the Accounts page layout. See above for more details on how to do this. Next, check the Read Only option from the field settings on the right, and click the down arrow. This will open the filter options for the read only setting of the Account Number field. Now set the filter so that the field is Imported?, the operator is Equals, and the value is Yes. The Account Number field will now be set to read only whenever the condition is applied, and won’t be changeable.